Austausch bewährter Verfahren
Erhalten Sie Einblicke in Strategien für eine erfolgreiche Zusammenarbeit und erfahren Sie, wie Sie Passwörter erfolgreich im Team teilen.

Written by Owen Parry
Updated at June 9th, 2025
Nutzen Sie die Freigabe – sie ist eine hervorragende Möglichkeit für die Zusammenarbeit Ihres Teams
Die Freigabe ist eine der leistungsstärksten Funktionen in Password Boss und bietet Ihnen eine sichere Möglichkeit zur Zusammenarbeit mit Ihrem Team.
Sharing items in Password Boss
How Sharing Works
Share Permissions
Editor
- View all item details, including passwords.
- Edit fields.
- Add items to the share.
- Remove the Owner.
- Convert the share to a vault.
Read‑Only / Password Visible
- View everything, including passwords.
- Use autofill.
- Edit or delete.
- Add items.
Read‑Only / Password Hidden (Invisible)
- Use autofill to log in without seeing the password.
- Access non‑sensitive metadata (if allowed).
- View or copy the password.
- Access hidden fields.
- Extract credentials via extension or API.
Updated Behavior
- Copy Password is fully suppressed in the WebApp and Browser Extension.
- Autofill remains available.
-
Invisible access does not migrate when converting to a vault
How to share items
Shared items normally appear in the recipient's account a few minutes after creating the Share. Recipients will receive an in‑app prompt to accept the share.
WebApp
-
Open Password Boss.
- From the left menu, choose Share Center.
- Click on the Add Share button
 to create a new Share.
- The Create a new Share window will open.
-
Select the profile you want to share items from.
- Check the box next to each item or folder you want to share.

7. Click Next.
8. Enter a Name for the Share, add recipients, pick a permission (Invisible, Read, Editor), and click Add, use the How Long Should the Items be Shared feature (optional), and Save Share.


The recipient can then open the Share Center, and on the Shared with Me tab they can Accept or Decline the Share.
iOS
-
Open Password Boss.
- From the bottom menu, tap More

- Tap Share Center.
- Tap the green and white circle

- Tap Individual Items or Entire Folder.
-
Tap the items you want to share.
- Tap Next.
- Enter a Name for the Share, add recipients, pick a duration, and tap Share item.

- The recipient can then open the Share Center and on the Shared with Me tab, they can Accept or Decline the Share.
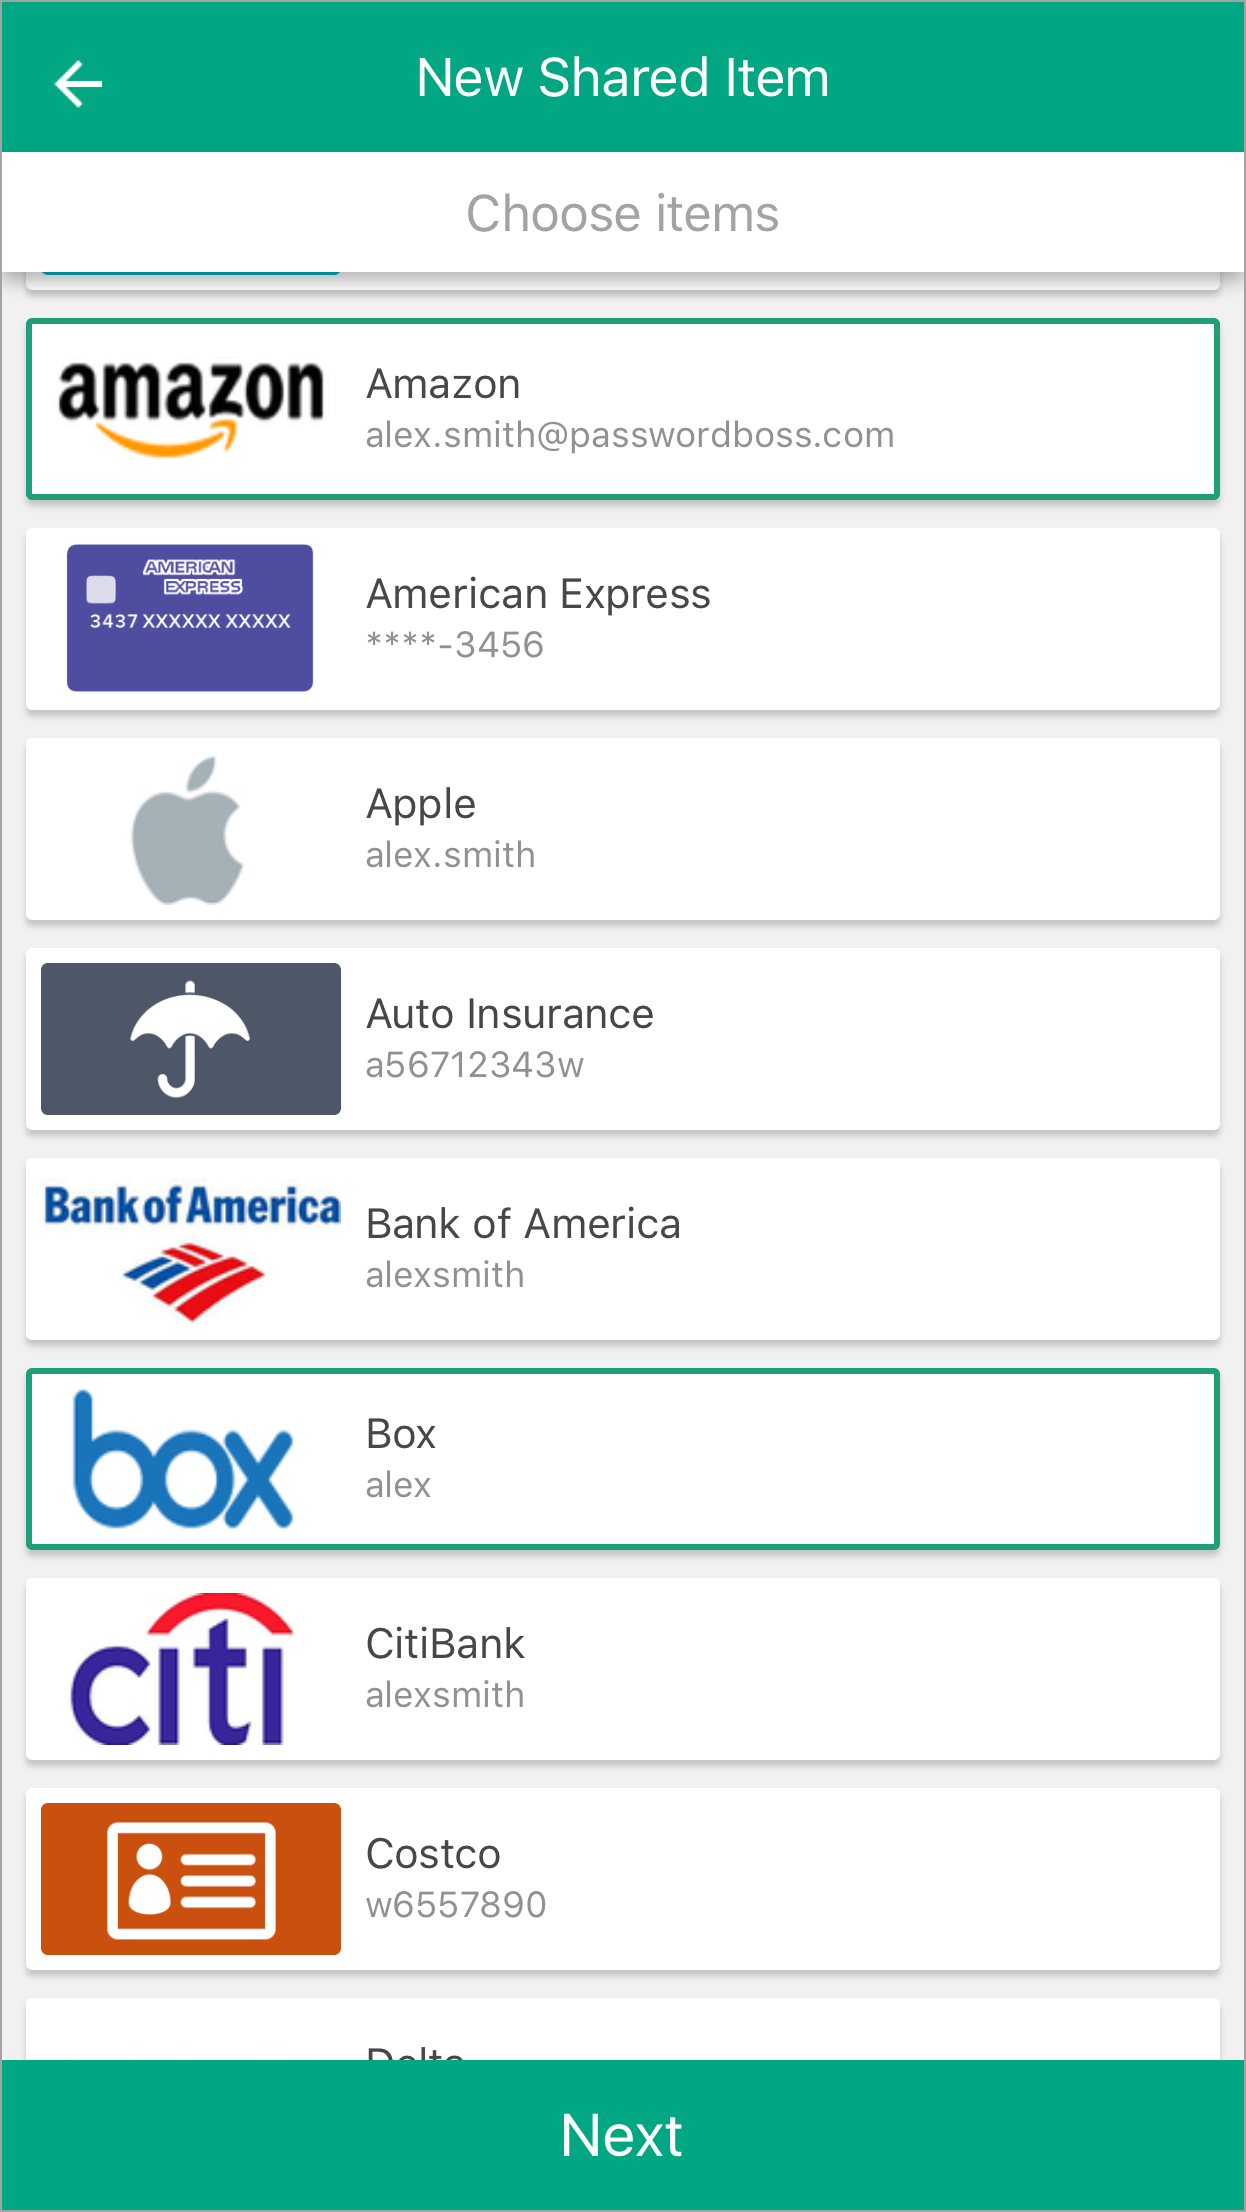
Android
-
Open Password Boss.
- From the top left tap the menu icon

- Tap Share Center.
- Tap on the orange circle

- Tap Individual Items or Entire Folder.
-
Tap the items you want to share.
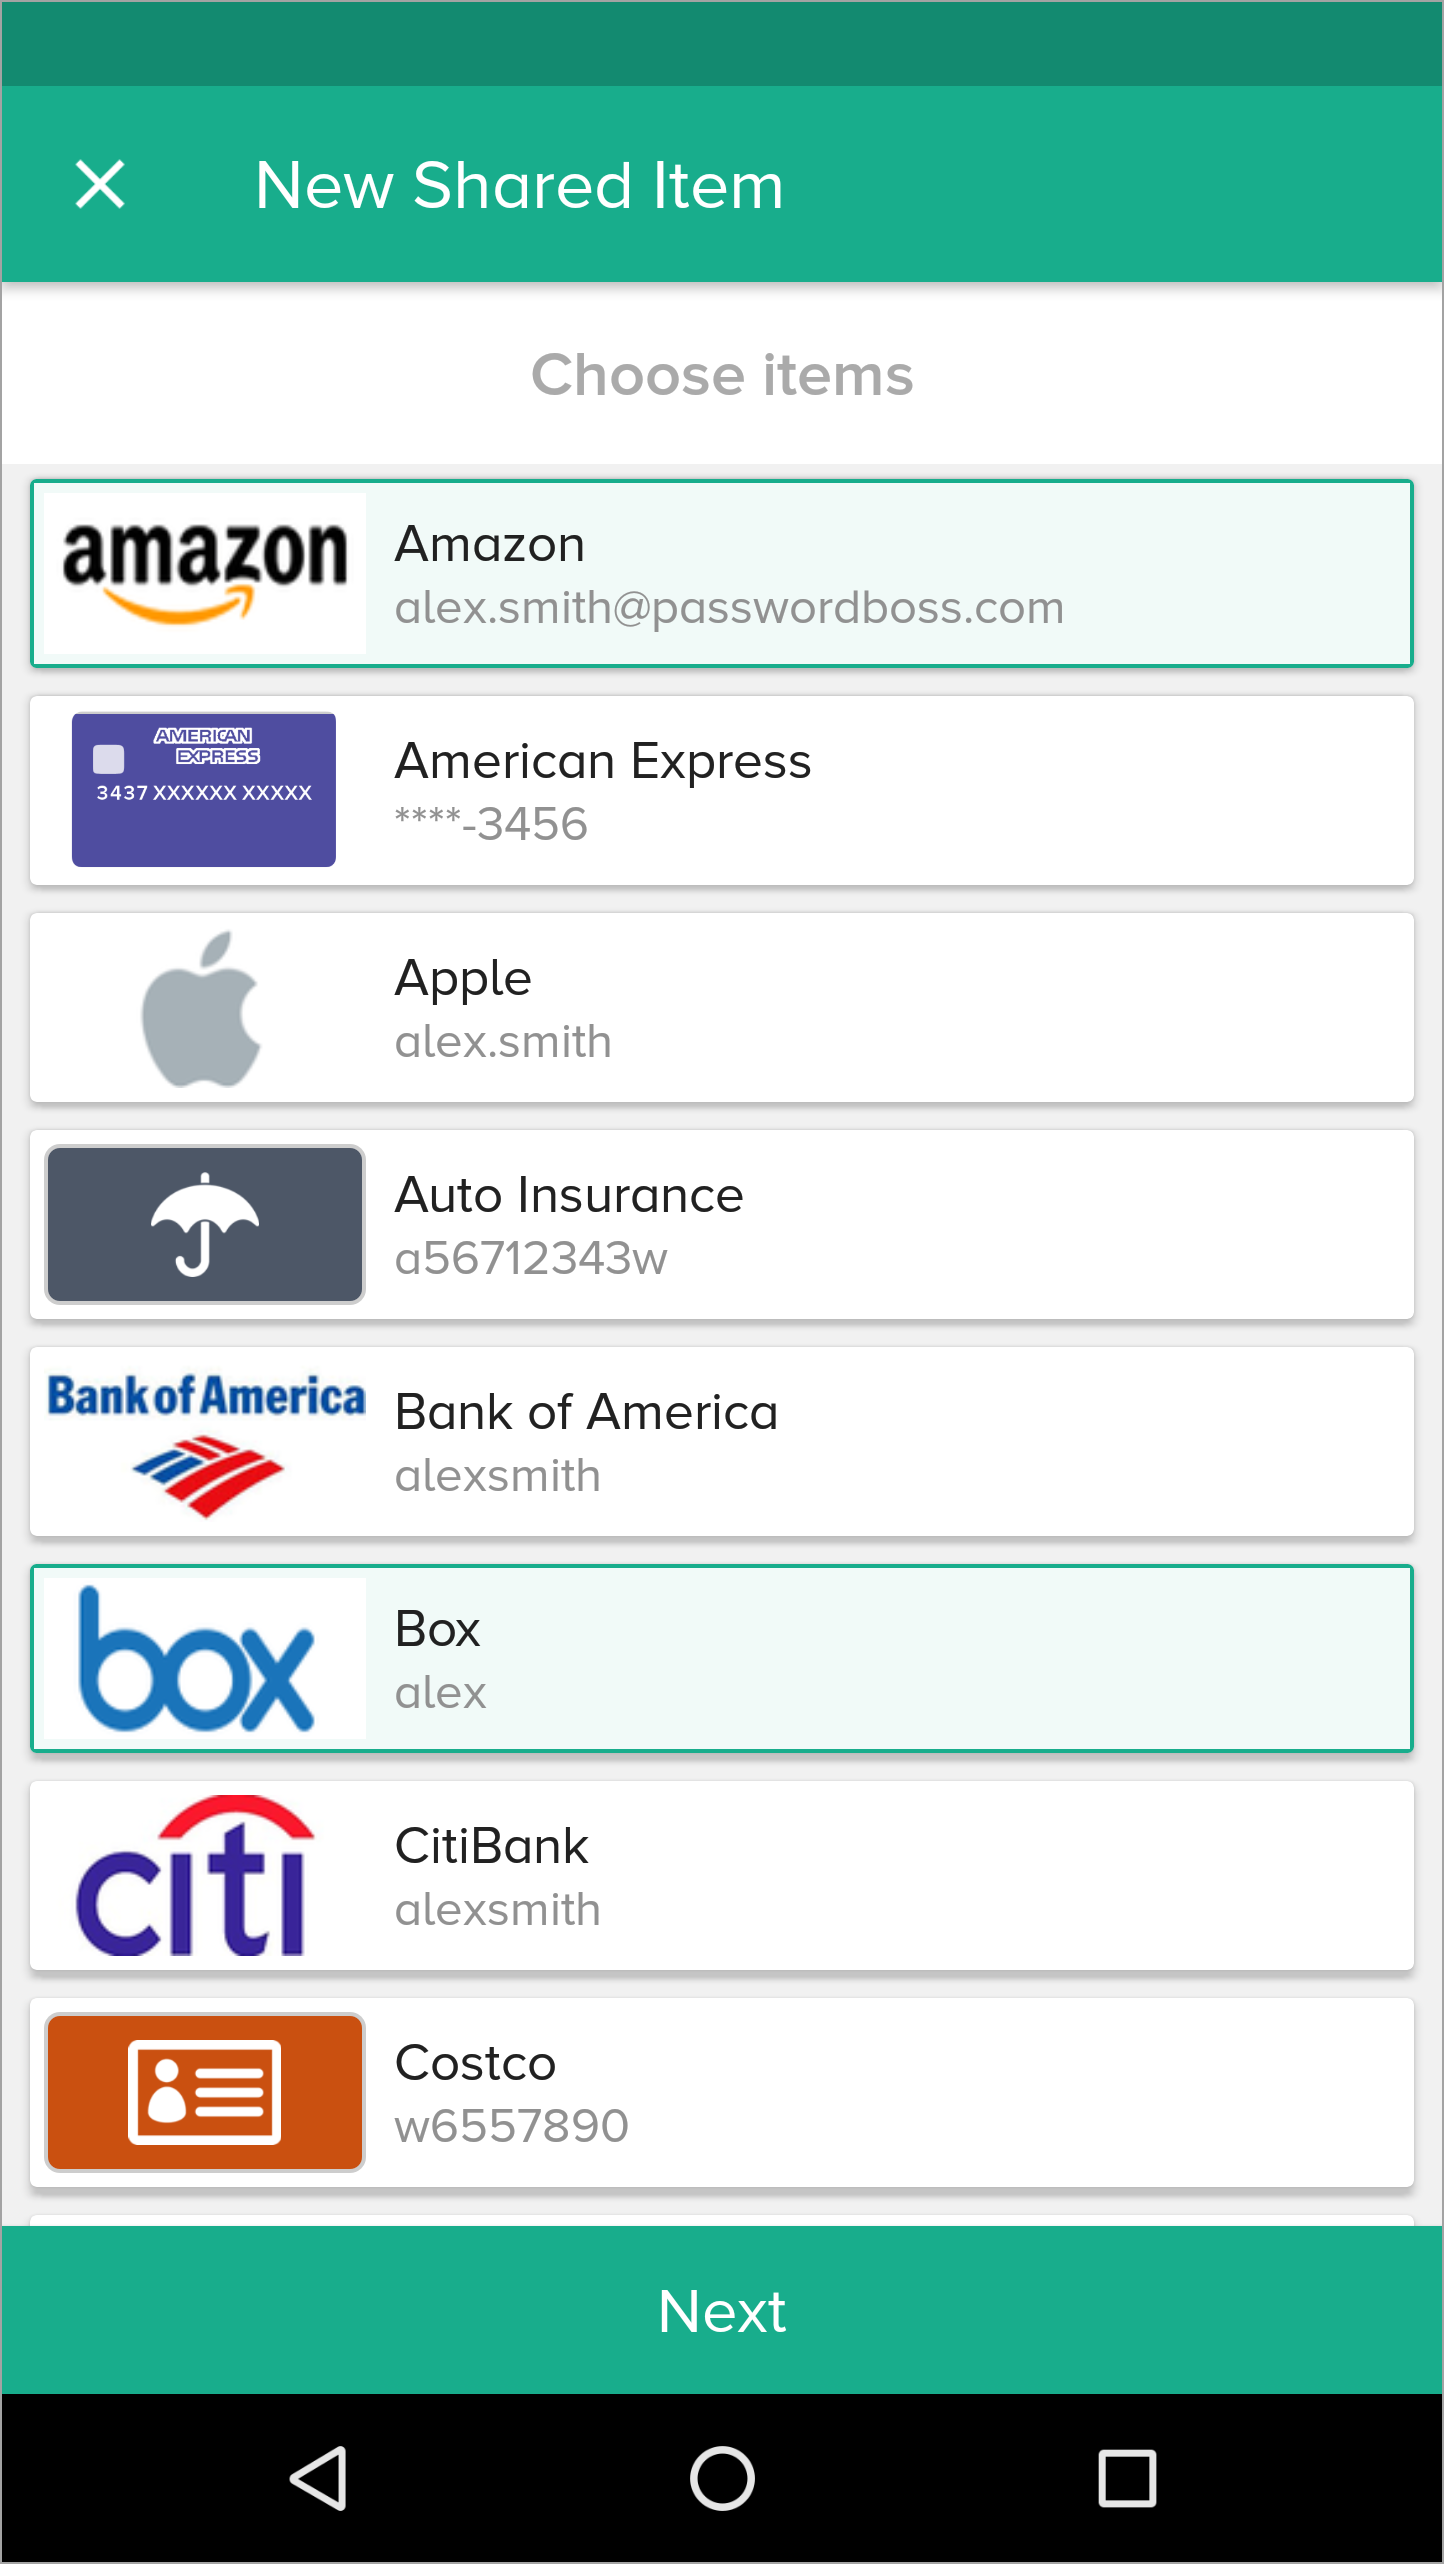
- Tap Next.
- Enter a Name for the Share, add recipients, pick a duration, and tap Share item.
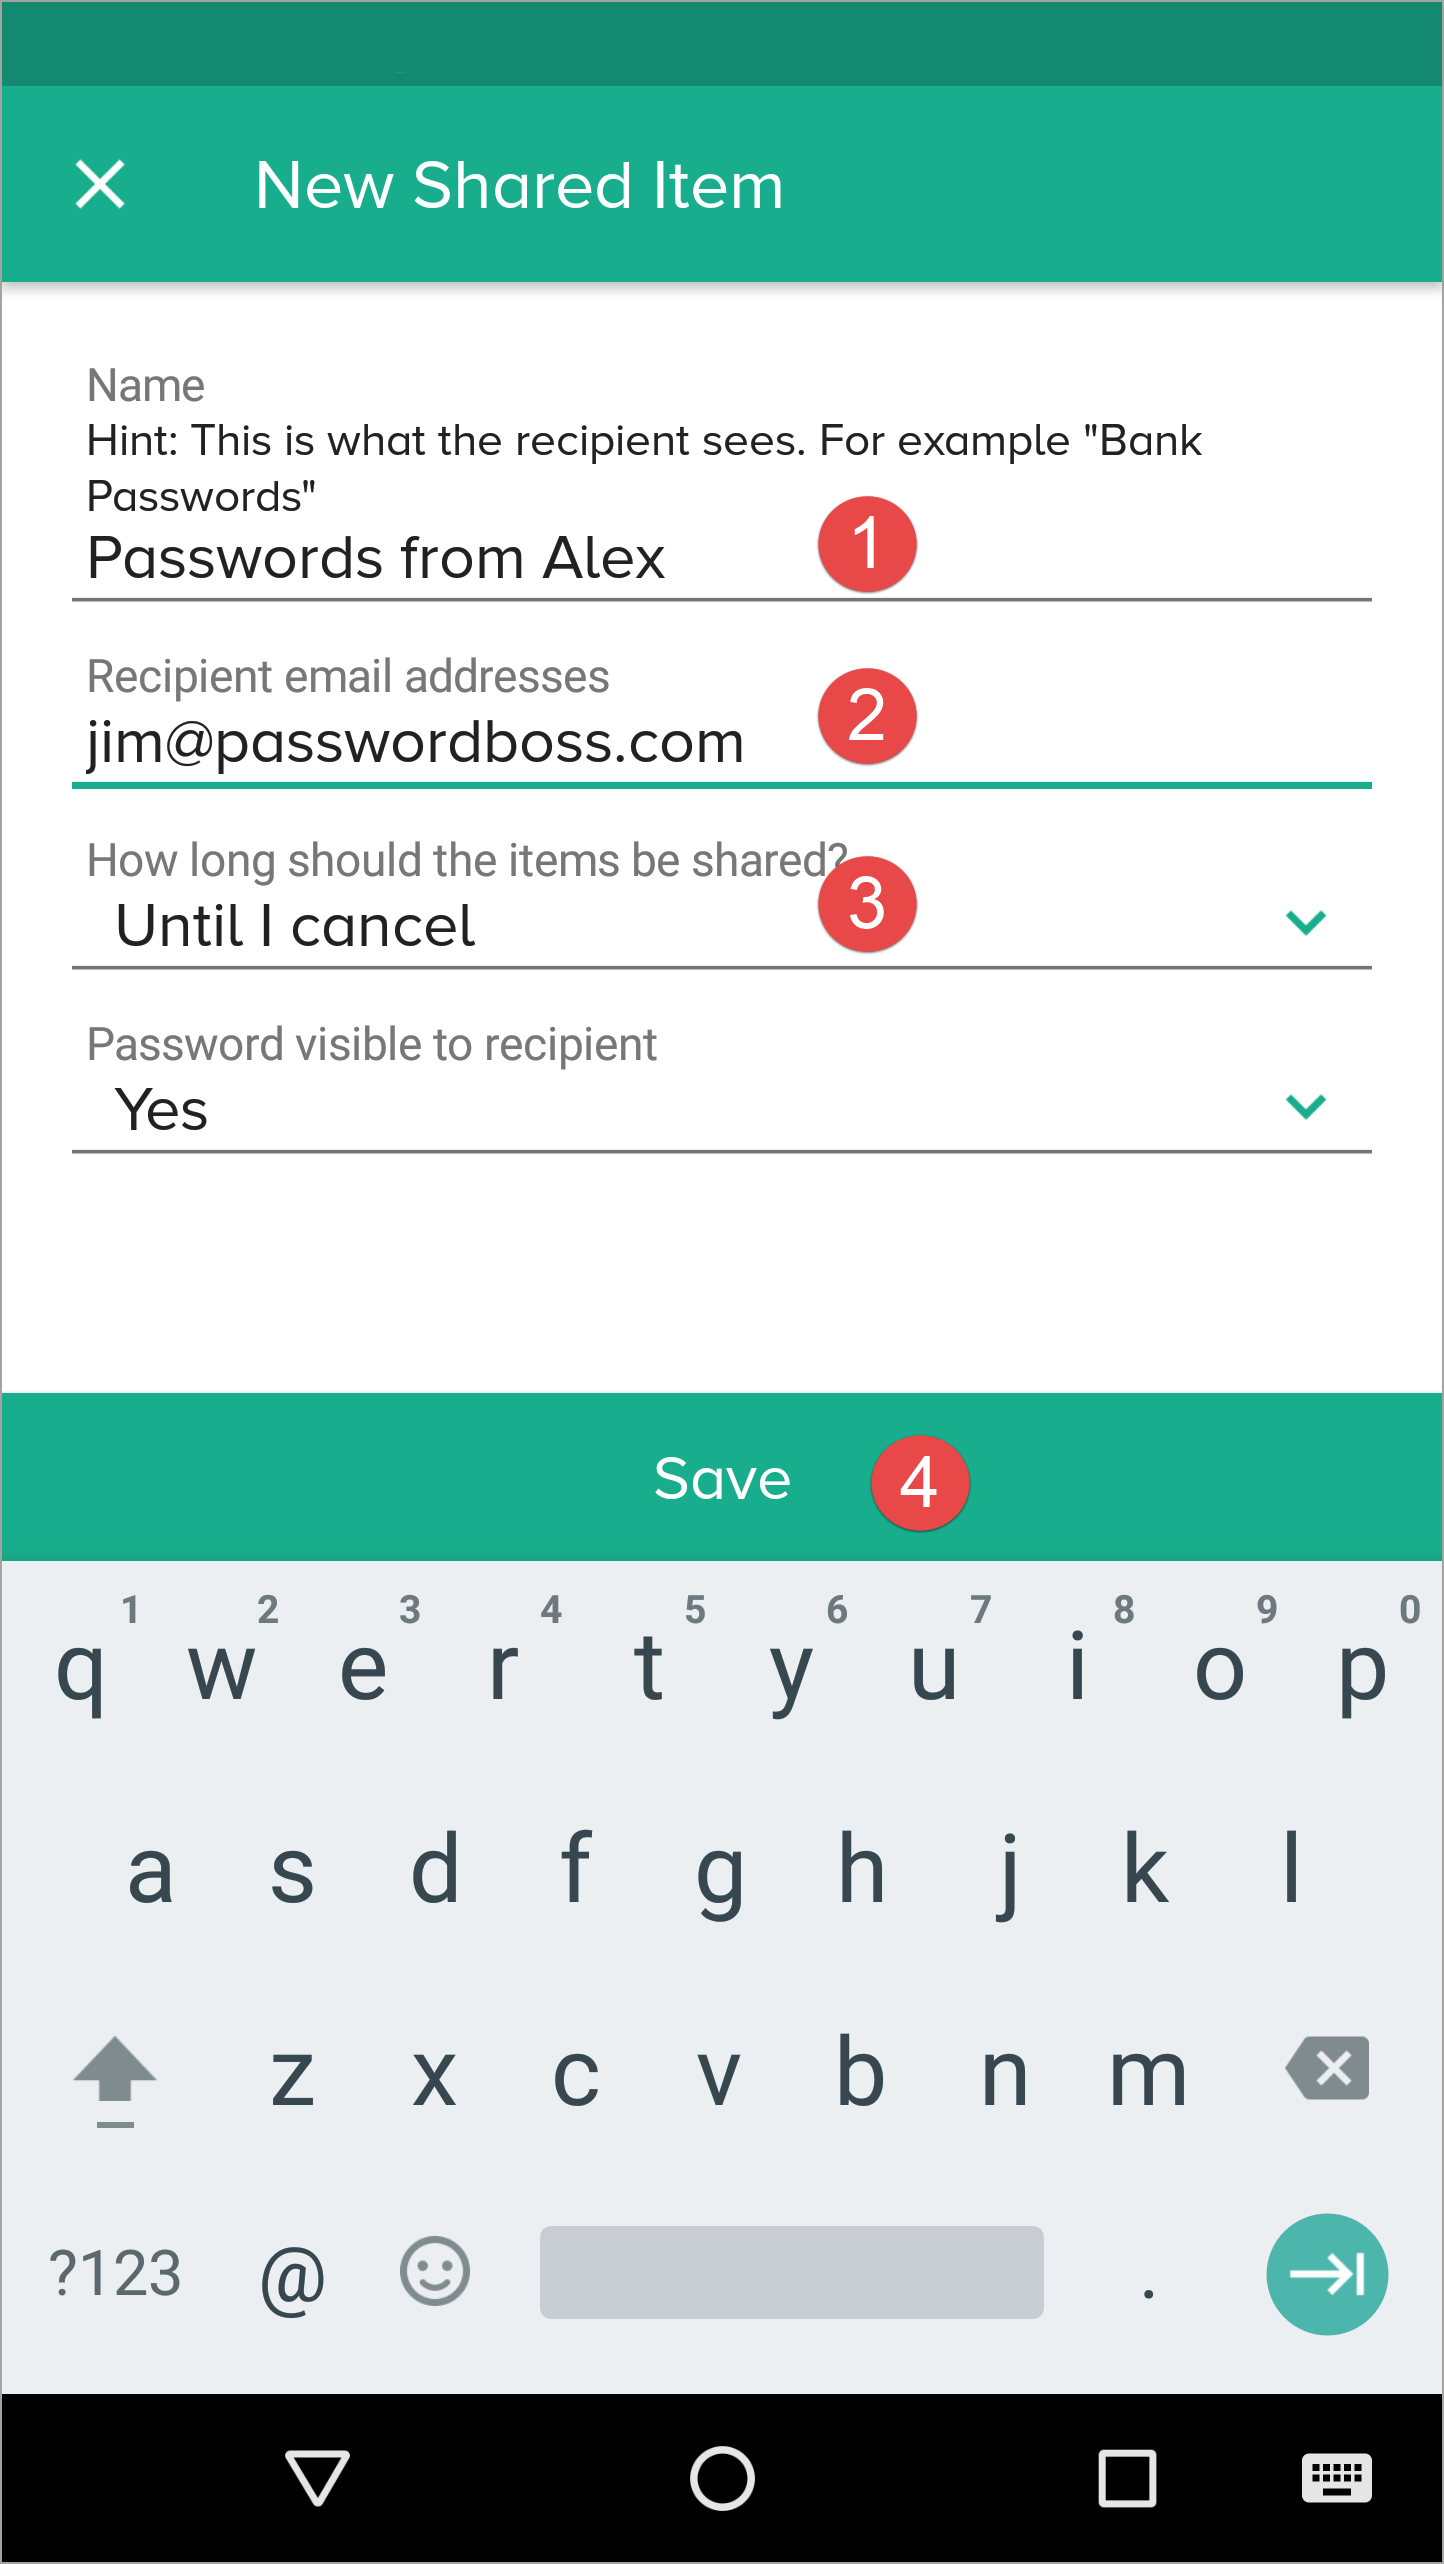
- The recipient can then open the Share Center and on the Shared with Me tab,they can Accept or Decline the Share.
Managing Existing Shares
Actions Include:
- Changing roles (Invisible → Reader → Editor).
- Removing a recipient.
- Reviewing activity logs.
Converting a Share to a Vault
When to Convert
- Multiple people need ongoing access.
- You want role‑based management.
- You want the ability to assign multiple Owners.
Important Rules
- Items are moved to the vault.
- Clone items in other shares stop being shared elsewhere.
- Invisible recipients are not added to the vault.
- Former recipients must be assigned Vault roles manually.
Behavior in the Browser Extension
- Editor: Full view, editing shortcuts.
- Read‑Only Visible: View and autofill.
- Invisible: Autofill only; no copy, no reveal.
Behavior on Mobile Apps
- Password visibility follows permission level.
- Invisible users attempting to reveal a password see a Not permitted message.
- TOTP is shown only if visibility is part of the assigned role.
Security Considerations
- Sharing uses Zero‑Knowledge encryption.
- Only the Owner and approved recipients can decrypt items.
- Invisible mode exists to allow login use without exposing secrets.
- Activity Logs track role changes, recipient additions/removals, and vault migration.
Summary
- Sharing supports granular permissions.
- Invisible users have the strictest restrictions and cannot migrate to vaults.
- Role changes take effect instantly everywhere.
- Converting shares to vaults centralizes control and enhances team management.
Verwenden Sie Gruppen, um Elemente freizugeben
Ein Administrator Ihres Teams kann Benutzergruppen im Portal erstellen, beispielsweise Marketing, Finanzen, Personal usw. Wenn Benutzer zu Ihrem Team hinzugefügt oder daraus entfernt werden, lassen Sie den Administrator die Gruppenmitgliedschaft im Portal aktualisieren.
Wählen Sie beim Erstellen von Freigaben Gruppen statt Einzelpersonen als Empfänger aus. Bei Verwendung von Gruppen müssen Sie die Freigabe nicht bearbeiten, wenn sich Ihre Teammitgliedschaft ändert. Solange die Teammitglieder des Benutzers den Gruppen im Portal hinzugefügt sind, erhalten sie die freigegebenen Daten automatisch, wenn sie sich bei ihrem Password Boss -Konto anmelden.
Use groups to manage users
Why you should use groups
Groups are designed to make it easy to manage recipients of shared items. The benefits of using groups include:
- Shares sent to groups are automatically updated as the membership changes. If shares are sent to individuals, each must be manually edited as the recipient list changes.
- It is quicker to manually choose groups as recipients then add each recipient individually.
- If you need to review a share and who has permission to share, you do not need to scroll through long lists of recipients.
The Everyone group
All teams have an Everyone group that is automatically created for your team. The Everyone group contains all team members from your account. The membership of the Everyone group is maintained automatically by Password Boss.
The Everyone group includes everyone in your account. Only share to the Everyone group as a recipient when all team members need access to the shared items. If only some team members need access to the shared items, create a new group with limited membership.
Use meaningful names for groups
- Use names for your groups that describe the group so that other team members can identify the group. Group names that identify the group, project, or department make it easy for other team members to know what the group is for. Examples: Marketing, Finance, Project Alpha.
- Consider adding the permissions to the name of the group.
- Depending on your team structure, it may be useful to create groups that will be used to assign read-only permission and other groups with editor permissions. Examples: Marketing-Read Only, Marketing-Editor, Sales-Read Only, Sales-Editor, Admin-Read Only, Admin-Editor.
Avoid duplicating groups
Keep your list of groups concise and avoid making groups that duplicate the membership in an existing group.
How to create groups
- Login to the Password Boss portal as an admin for your team.
-
Click Users & Groups from the left menu.
- Scroll down to the Groups section.
- Click +Create New Group.
-
Enter a group name and click save.
How to add or remove users from a group
- Login to the Password Boss portal as an admin for your team.
-
Click Users & Groups from the left menu.
- Scroll down to the Groups section.
-
Find the group you want to change.
- From the blue Actions button
 Choose Edit.
-
Add or remove users from the group. You can also edit the name of the group from this screen.
-
Click Save when you are done.
How to delete groups
- Login to the Password Boss portal as an admin for your team.
-
Click Users & Groups from the left menu.
- Scroll down to the Groups section.
-
Find the group you want to change.
- From the blue Actions button Choose Delete.
- On the confirmation screen, click Delete group.
Rollen und Berechtigungen verstehen
Wenn Sie eine Freigabe erstellen, können Sie mithilfe von Berechtigungen die Sichtbarkeit von Kennwortelementen in der Freigabe steuern.
Rollen und Berechtigungen für Empfänger freigegebener Elemente
Empfänger freigegebener Elemente (Ordner oder einzelne Elemente) können über drei mögliche Berechtigungen verfügen. Dieser Artikel erläutert die einzelnen Berechtigungen.
Editor
- Mächtigste Berechtigung
- Benutzer können alle Felder sehen und alle Felder ändern.
- Benutzer können der Freigabe neue Elemente hinzufügen.
- Alle Änderungen eines Redakteurs werden direkt an alle Empfänger gesendet. Änderungen müssen nicht über den Freigabebesitzer laufen.
Nur Lesen / Passwort sichtbar.
- Benutzer können das Passwort und alle anderen Felder eines Artikels sehen.
- Der Benutzer kann keine Felder am Artikel oder an der Freigabe ändern.
Nur Lesen / Passwort nicht sichtbar.
- Restriktivste Berechtigung
- Benutzer können das Kennwort nicht sehen, sich aber bei einer Site anmelden.
- Der Benutzer kann keine Felder des Artikels ändern.
🚧 Wichtiger Hinweis zu „Nur Lesen / Passwort nicht sichtbar“
„Nur lesen – Passwort nicht sichtbar“ blockiert den Zugriff des Empfängers auf das Passwort nicht. Diese Berechtigung blockiert den Zugriff des Empfängers auf das Passwort in der Password Boss -Anwendung. Sobald das Passwort auf einer Website eingegeben wurde, kann Password Boss den Benutzer nicht mehr daran hindern, das Passwort direkt von der Webseite abzurufen.