SSO with Entra ID (Azure AD) for AutoElevate
Learn how to enable and configure single sign-on (SSO) with Azure Active Directory (Azure AD).

Written by Owen Parry
Updated at March 17th, 2026
Table of Contents
Provision new users and sign onto AutoElevate with your Entra ID identity provider. Set up with a single click and a quick mapping of your Entra users/groups to AutoElevate roles. This mapping allows you to manage the roles of your AutoElevate users, who have access, right from Entra ID.
Important notes about setting up SSO with Entra ID
- Only an AE Administrator can enable this service.
- Only an Entra ID user with proper permissions, such as a Global Administrator, can accept permissions and add users.
- Entra ID multi-factor authentication (MFA) is required to log in with the ID Provider. This can be enabled under Users > Per-user MFA in Entra ID or with Conditional Access.
- This feature is only for Admin, Technicians, and those who wish to provide access to the AE Admin Portal and not end users.
- Only one role can be assigned to a user account and is required to access the AE Admin Portal.
- AE user email must match the Entra ID user account.
- GCC Entra ID is not fully supported with the AutoElevate integration. Users can sign in using the Entra ID option, but user syncing is not available. Additionally, changes such as user role updates will not be reflected automatically. Admins must manually create and manage users in the AutoElevate Admin Portal.
Enable Entra ID SSO
- From the (1) Settings screen in the AutoElevate Admin Portal, you will need to go to (2) Admin Portal & Mobile App Authentication, and edit the (3) Single Sign On (SSO) with Entra ID option (pencil icon)

- Then click the ENABLE SSO WITH Entra ID button. It will redirect you to log in to your Microsoft account and accept permissions (requires a user with appropriate permissions, such as Global Administrator). You will also have the option to consent on behalf of your organization.
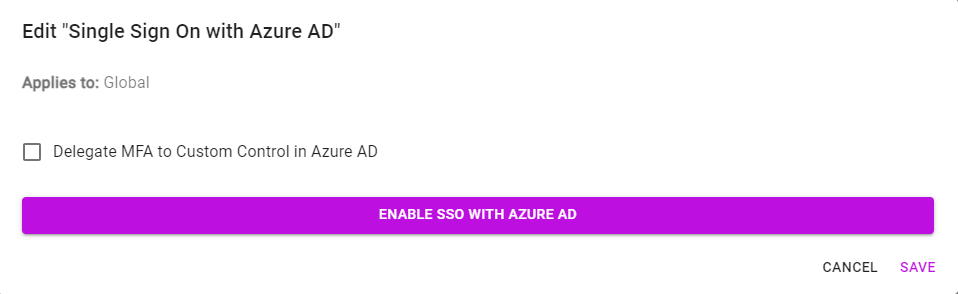
- MFA for SSO integration can be delegated to Custom Control in Entra ID (for 3rd party MFAs such as DUO). To enable this feature, navigate to the Settings tab > Single Sign On and click on the pencil icon. From there, you will find a checkbox labeled Delegate MFA to Custom Control in Entra ID. Simply check this box and a prompt will appear with the terms. Confirm then SAVE.
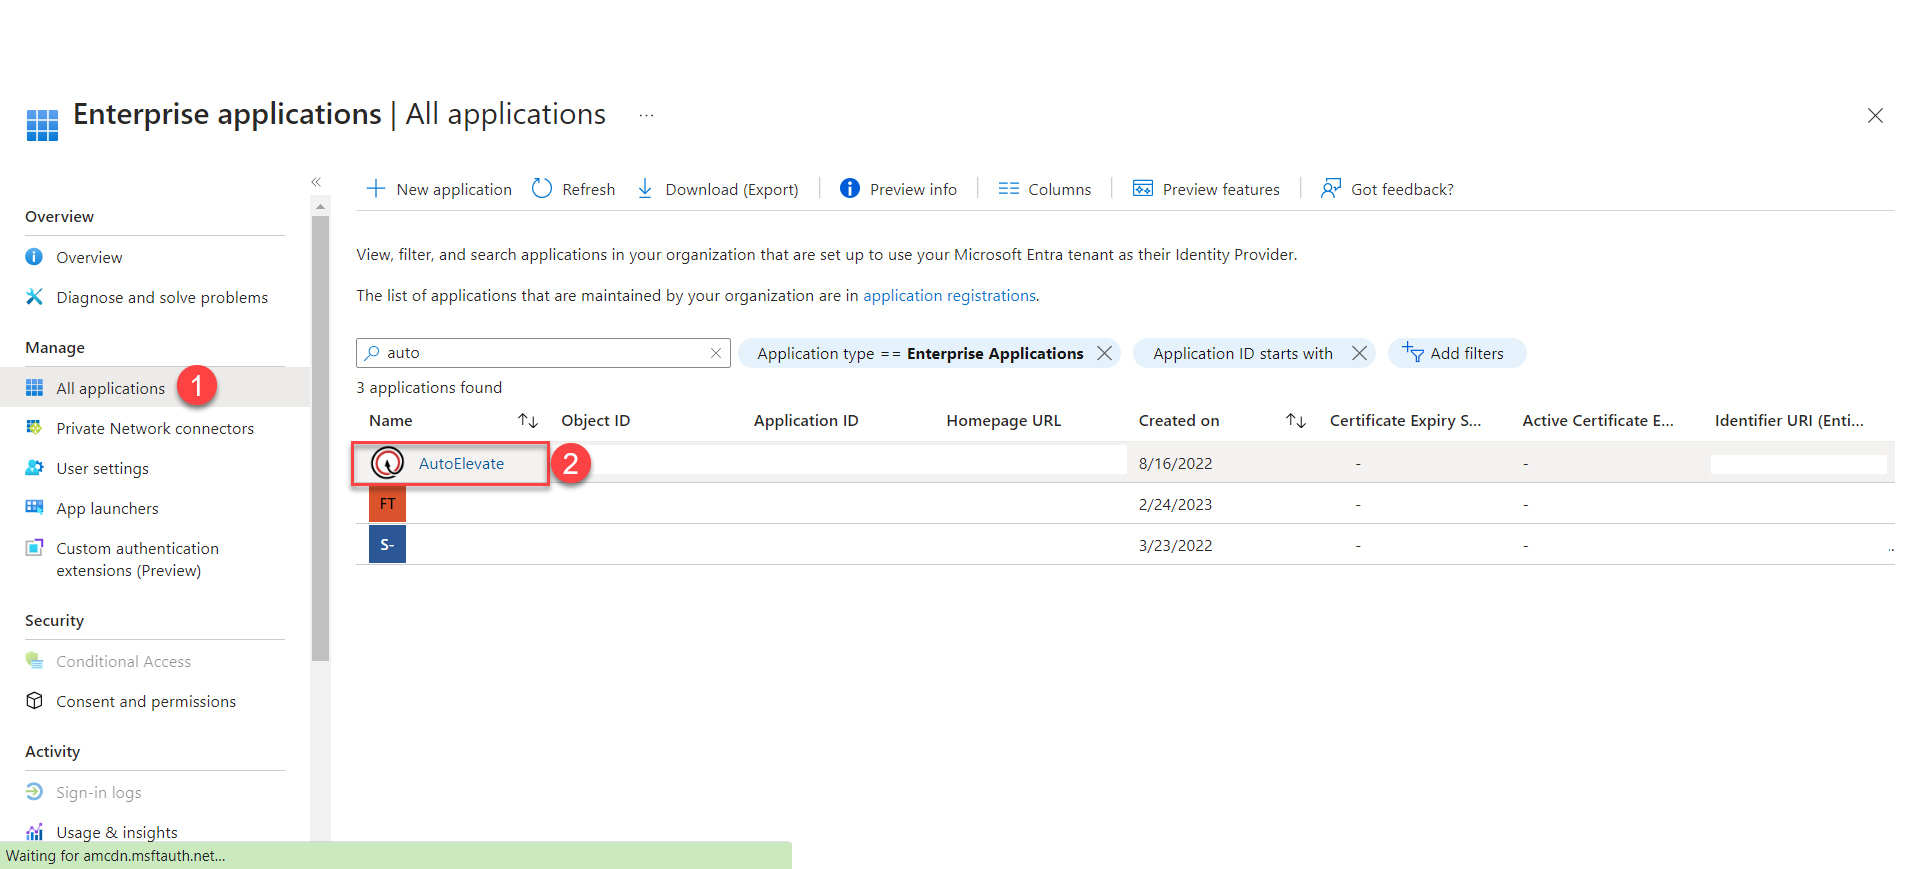
- Now you can assign Entra ID users to the proper AutoElevate role by Going to Enterprise Applications in Entra ID and select (1) All applications and clicking on the (2) AutoElevate app that has been added.
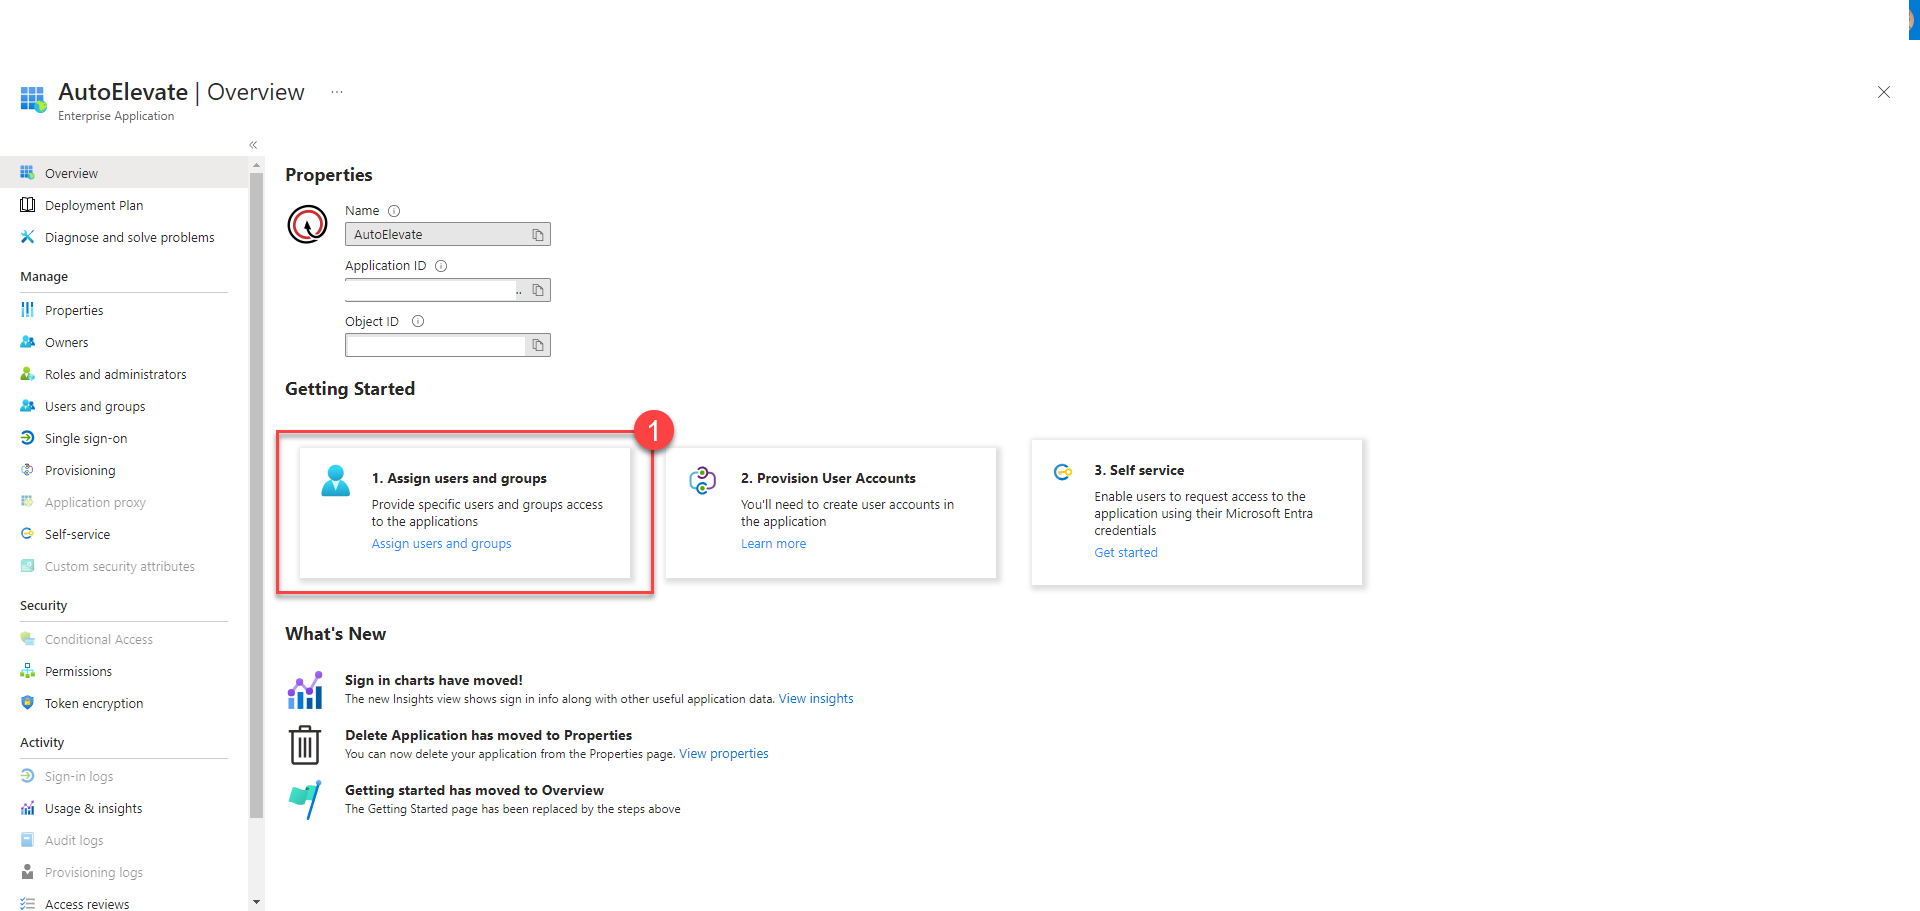
- Click on (1) Assign users and groups.
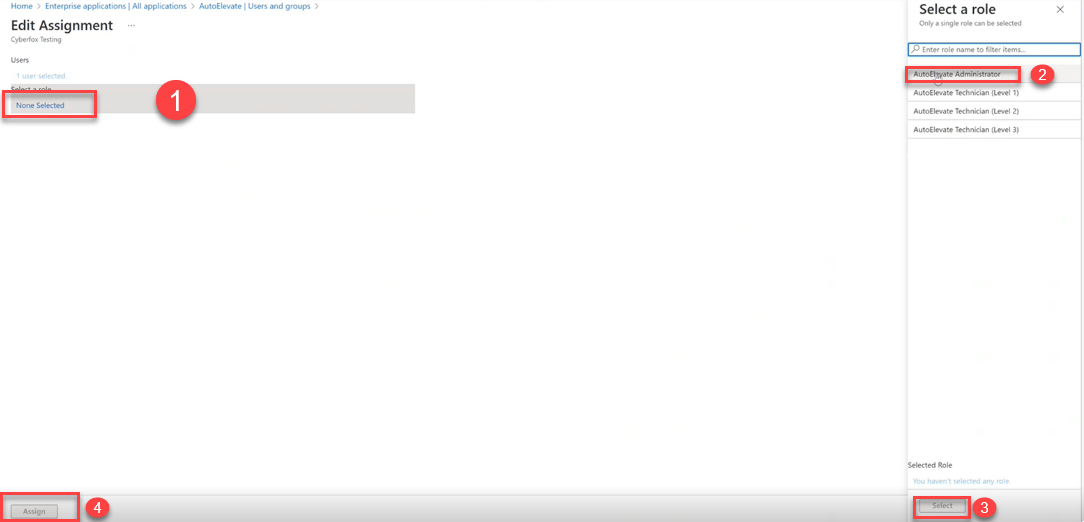
- Click on the user/group >Click (1) Select a role: None Selected > (2) Select role on the right (default roles) > (3) Click Select (bottom right) > (4) Click Assign (bottom left)
- Once these steps are taken, it can take from 30 seconds to a minute to add and propagate through the system.
- Once complete, the user can attempt to login using SSO and all Admins will receive an email to configure the new user’s company access with a link to the AE Admin Portal, or an Admin can manually create the user beforehand.
- The user can then log in from the AE Admin Portal using LOG IN WITH Entra ID on the AE Admin Portal login page.
Co-managed Users
When setting up a co-managed user, follow these steps:
- Begin by navigate to the Users screen in the AutoElevate Admin Portal and creating the user in the portal first.
- Specify their role and company access.
- Make sure to click 'SAVE' without sending an email.
- Proceed to Entra AD and include them in your tenant as an external user.
- Finalize the setup by assigning the appropriate AutoElevate role to the user.
Note: An Entra ID user with proper permissions, such as a Global Administrator, must accept permissions for the co-managed tenant.
Enforcing SSO
From the User screen Actions menu, you can Remove Password for existing users to enforce SSO.