MSP Best Practices For PasswordBoss
Tips and ideas on how to setup Password Boss for your internal use

Written by Owen Parry
Updated at July 16th, 2025
Table of Contents
Overview
This guide covers best practices and tips for using Password Boss internally in your MSP. Each aspect of Password Boss provides flexibility in how to use the app, and this guide provides some MSP-specific recommendations.
General Concepts
This section lists product features and design details.
- Each user has their own unique account that, by default, nobody else can access.
- Within each user’s account, there are two profiles – a personal and a business profile.
- Each saved item in Password Boss is saved in one of the user’s profiles.
- The user who creates an item and saves it in their account is its owner. Items can only have one owner.
- The Password Boss administrator can enable backups of all the items in each user's business profile. The administrator cannot access the items in the personal profile, so they are excluded from these backups.
Create a master account.
All saved items need to be owned by a single user. In an MSP environment, the best practice is to create one or two master accounts where you will create all saved items. These master accounts would then be accessed by the key members of your team who are the owners of the saved items.
- Use a generic email address for the master accounts. For example, pbadmin@contoso.com.
- Limit who has access to the master accounts.
- Secure the master accounts with 2-factor authentication. If you are sharing the master account between multiple techs, you will need to use a 2FA authenticator like Authy that allows you to sync the 2FA secret between multiple devices.
- If using more than one master account, split your customers between the master accounts using some logical separation. For example, customers A-M are in master account 1, and customers N-Z are in master account 2.
- All Password Boss accounts need to be logged in to process updates and synchronize data. Master accounts will be processing a large amount of data and keeping all shared passwords in sync between all users. The best practice is to keep the master account user(s) logged into Password Boss whenever possible.
Setup for your Master Account
- Save all customer passwords and other items in the master account(s)
- Use folders and subfolders to structure the data. See the Folders section for more info.
- Create shares for the members of your team who need access to the saved items. See the Shares section for more info.
Establish Naming Conventions
Establishing naming conventions for all items in Password Boss makes it easier for your team to find and use the items saved in Password Boss.
- All of the items for each customer should be stored in a folder. The name of the folder should match the customer name used in your other PSA and RMM apps.
- Depending on the number of items saved for each customer, it may make sense to create subfolders under each customer folder to organize items. For example, making subfolders for servers, network gear, websites, etc.
- To make it easier for techs to find a password, add the client name, or an abbreviation if the client name is long, to the name of the saved items. For example, this is a server name for the customer named “ABC Manufacturing”: ABCMfg – DC1 – Main Building.
- When a tech is on a mobile device, using the search function is often the fastest way to locate a password. If all of the passwords for a customer include the customer name in the saved item name, the tech just needs to enter the customer name (or abbreviation) to quickly find passwords.
- Adding the customer name to the name of saved items also allows you to sort items in the main app to see all saved items for each customer.
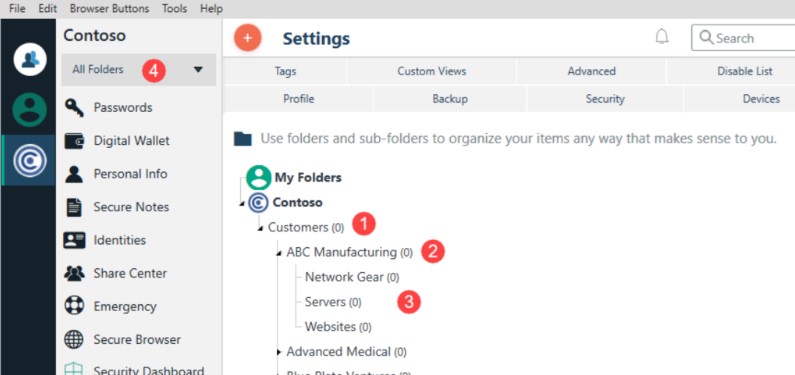
Folders
In Settings->Folders,, create your folder structure. Here is an example.
- In the business profile, create a top-level folder called Customers.
- Make a subfolder for each customer.
- Under each customer, make any necessary subfolders.
- The folder picker on the left side navigation allows you to filter your view down to a single folder.
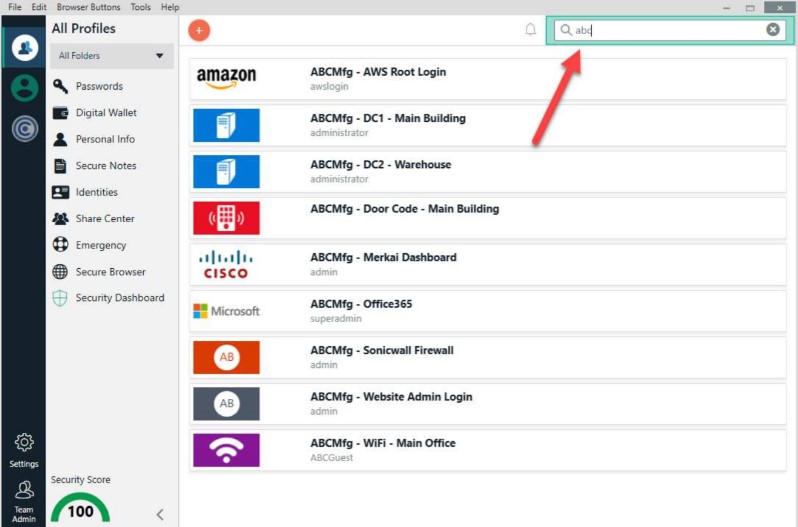
Naming Convention & Search Function
When you are using the Search function, you can search based on the name of a folder.
For example, if all servers are in subfolders for each customer called “Servers”, you can enter “Servers” in the search box and see all servers for all customers.
Finding saved items
Showing all saved items for one customer when searching by the customer name (or abbreviation) in the search box.
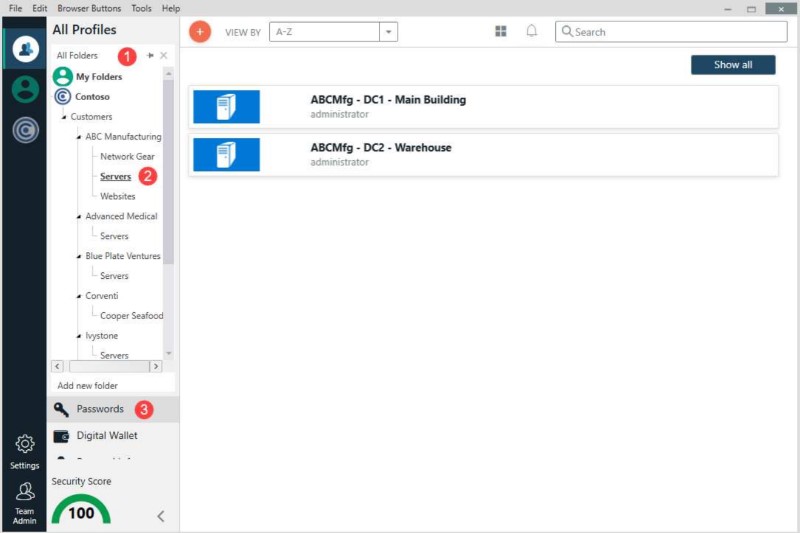
Showing all saved items in an individual folder.
- Expand the all folder list and click the pin icon to keep the folder list open.
- Select a folder to see all of the items in the folder.
- This view is filtered to only show the type of items selected.
Sharing
Every saved item in Password Boss can be included in a share.
- When creating a share, the originator can only include items that they own, meaning any items they receive in a share cannot be reshared.
- Each share can only include items from a single profile (either the business profile or the personal profile). For consistency, ensure all customer data is stored in the business profile of user accounts.
- Each share has one owner. The share owner is the only person who can add/remove a recipient to a share from within the client app. An admin can add/remove recipients from the portal. The owner of a share can be transferred to any other recipient of the share by an admin on the portal as well.
Meaningful Share Names
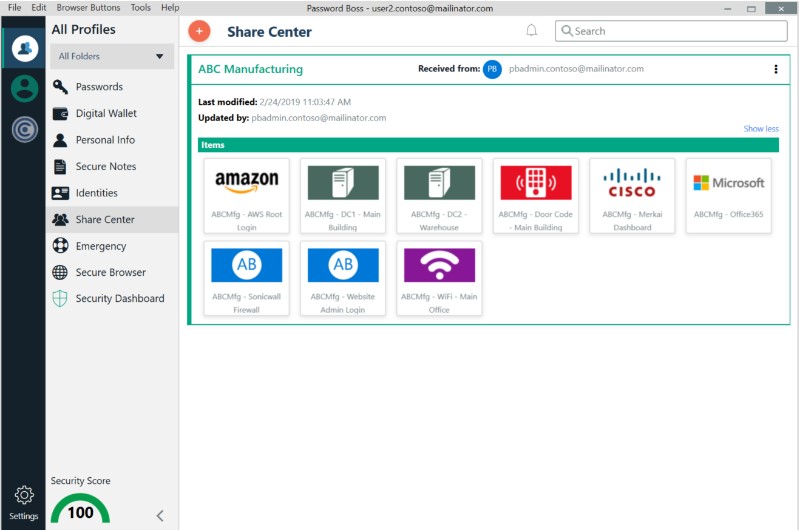
When naming shares, pick a name that will be meaningful for the recipient of the share. Naming a share “Shared Passwords” does not provide enough information for the recipient. A more descriptive name might be the name of the customer (ABC Manufacturing), the category of the passwords (Server Passwords) or customer group (Customers A-M).
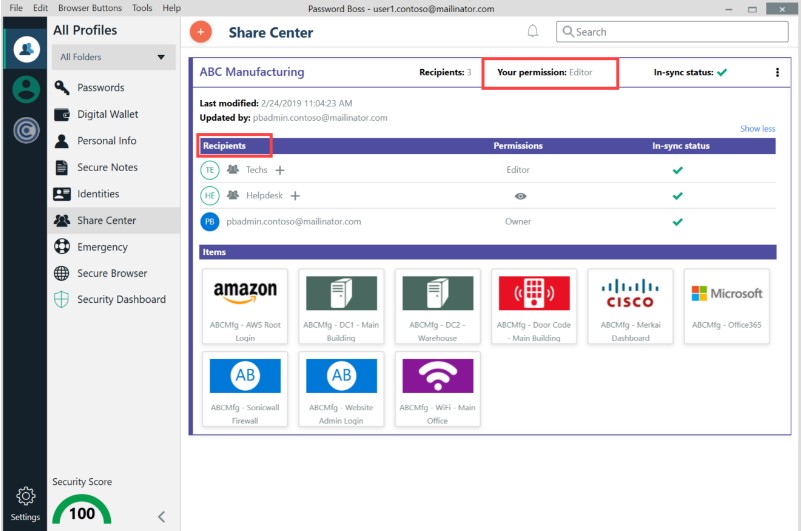
What Editor recipients see in the Share Center
Since an Editor can change data in a share and add new items to the share, Editors will see the entire recipient list of shares, including groups and group membership.
- The green check marks indicate that a recipient and the entire share are in sync with the same data.
- After making changes to shares, the in-sync status will show the percentage of recipients who have received the latest updates and who have not. Each user app will check for updates every 5 minutes while they are logged in. A user can check for updates at any time with the “Backup Now” function in the app.
What Read-Only recipients see in the share center
Read-only recipients see only data about themselves in the share center. They do not see the other recipients of the share or the share's in-sync status.
Accessing shared items
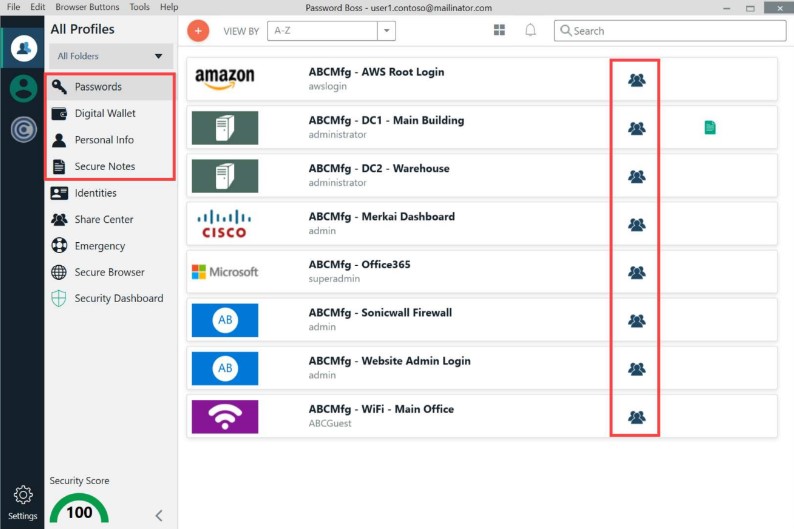
The most efficient way for recipients to access shared items is in the app's main sections (Passwords, Digital Wallet, Personal Info, and Secure Notes).
- Shared items can also be accessed via the Share Center, but without all of the sorting and viewing
options available in the main sections of the app. - Shared items will appear with a blue shared icon to indicate that the items have been shared.
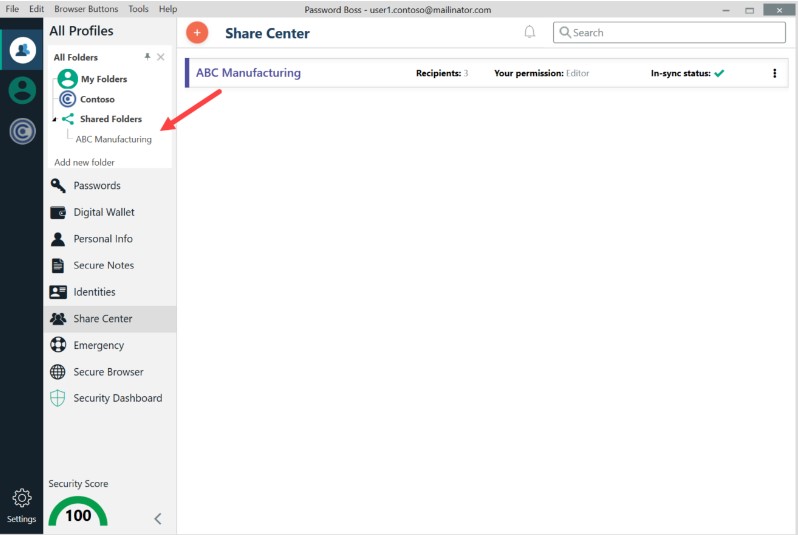
Shared Folders display
Recipients of a share will see the share name that the originator gave the share, in the Share Center. The name of the share is also the name the recipient will see in the Shared Folders.
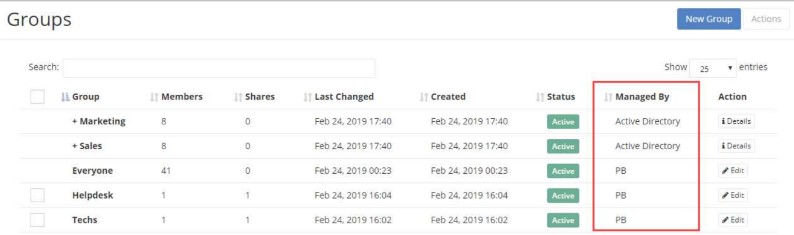
Groups
Groups are created in the Password Boss portal or synced from AD via the AD Connector.
- Groups in Password Boss are used to share items.
- After groups are created on the portal, users can add groups to shares within the client app.
- All client data shares should be sent to groups rather than individual recipients.
- When shares are sent to groups, as group membership changes, shared items are
automatically added or removed from recipient accounts.
Viewing groups in the portal
- Groups managed by Active Directory have their membership synced from AD.
- Groups managed by Password Boss are created and managed in the portal.
Security Policies
Security policies are set on the portal on the Security Policies tab, allowing you to configure company-wide settings and restrictions in Password Boss. A complete listing of the available security policies and recommendations can be found in the RUNBOOK - MSP Security Policy recommendations