NinjaOne Deployment Script
Learn how to deploy using NinjaOne with a simple script to get up and running quickly

Written by Chris Liles
Updated at April 8th, 2026
Table of Contents
This document explains how AutoElevate's official NinjaOne RMM deployment script works, how to install the component in your component library, and some considerations if you have previously deployed agents.
There is no need to create Companies in the AutoElevate Admin Portal manually.
When you run the script on the target device(s), the latest MSI will download and install, automatically filling in the License, Companies, and Locations. Then, you can refresh the data using the "Refresh Data" button in the AutoElevate Admin Portal 'Computers' screen, and you should see the company/location/computer show up.
How it Works
The script grabs the company and location from the environment variables on the endpoint and updates the MSI installation arguments along with the variables set in the component. This prevents the need to manually input the Company or Location Name when deploying.
Component Installation
- From within NinjaOne, go to Home>Administration>Library>Automation
- Click +Add button and select New Script
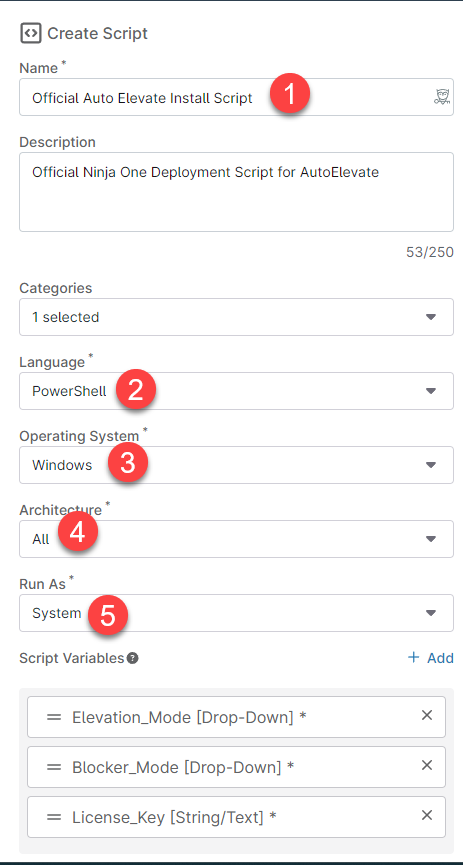
- Provide the script details (1) Name (2) Language (3) Operating System (4) Architecture (5) Run As
-
Drag and drop the script attached at the bottom of this document (AE_Install_Ninja_2024.PS1)
-
Create the Script Variables. Once uploaded, you must create some variables on the component before you save it to your library. The variables you will need to create are:
-
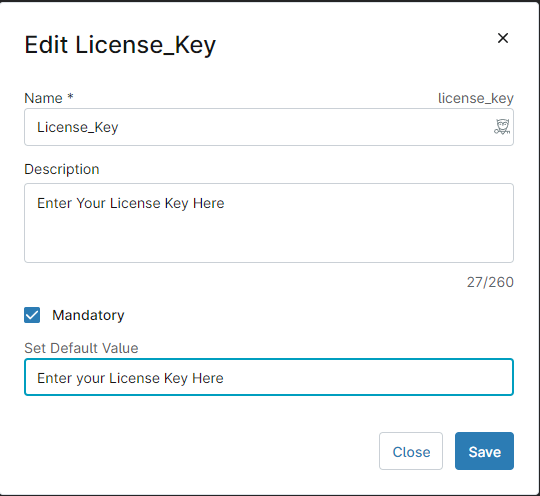
License_Key
- Type: String
- Data: This is located in the settings screen of your AE admin portal
-
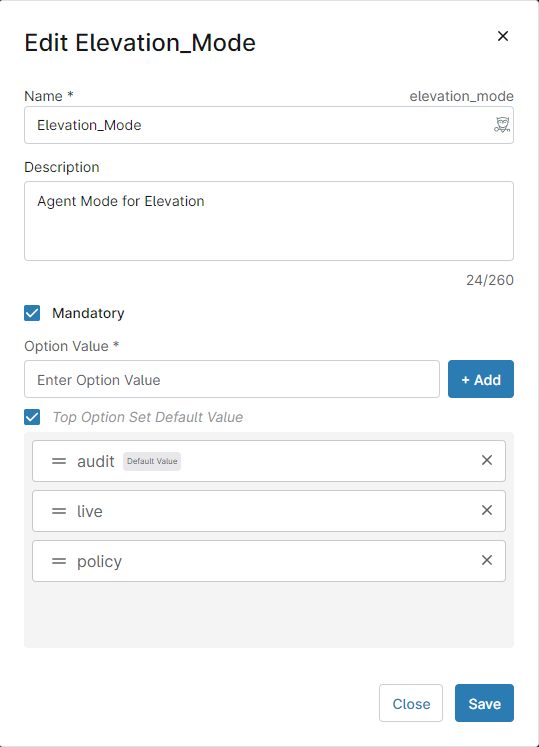
ELEVATION_MODE
- Type: Drop Down
- Data: “live” “audit” “policy”
-
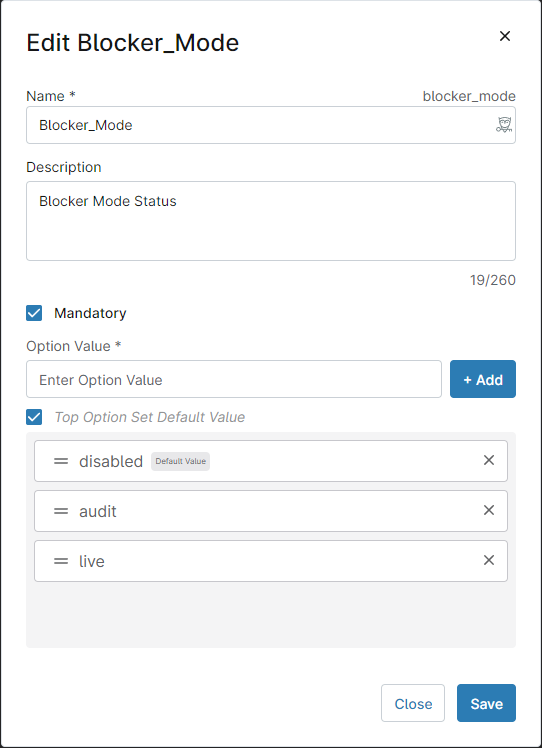
BLOCKER_MODE
- Type: Drop Down
- Data: “disabled” “audit” “live”
-
Save. Click the Save button in the top right corner.
-
Schedule a job. You are now ready to use this component to schedule jobs on devices listed in NinjaOne.
Additional Considerations
If you have manually created any Companies in the AutoElevate Admin Portal, you may see duplicates appear after using this script. This is because the NinjaOne location is being used to identify the new Company created by the script (something that you could not supply when creating them manually).
To resolve this issue and ensure that further script jobs for the same Company don't continue to create duplicates, you will need to merge the Companies. To do this, you will need to:
- Navigate to the Companies screen in the AutoElevate Admin Portal.
- Select both Companies in question.
- Select the Merge action from the Actions menu.
- Follow the instructions in the dialog to follow. It's important that you set the Company that was created with the script to be the "Target" Company. This will ensure that the older, manually created Company will be merged into the new one.
Setting Up Automatic Deployment
Ninja One will enable you to create automated installations based on specific conditions.
Go to Administrations > Policies > Windows Workstation
Click Add a Condition
Click Select a condition
- Condition is a Windows service
- Service is AutoElevate Agent
- State doesn't Exist
- Select “Trigger again if condition is still true after reset”

Click Apply
Click Add next to Automations and select your AE install script
Then, set the auto-reset to "When no longer met"

Click Apply
Save your policy
What this will do
This will now check to see if the AutoElevate service exists on a Windows workstation and force the script to kick off if it isn't listed.