Entra ID Connector for Password Boss
Learn how to use Azure Active Directory to manage users via Password Boss.

Written by Dominique Smith
Updated at May 14th, 2025
Table of Contents
Connect Azure (Entra) AD to Password Boss
The Password Boss Azure AD connector allows you to create and update a user account in Password Boss directly from Azure AD.
This connector does not synchronize the user's AD password to Password Boss.
Syncing groups from Azure Active Directory to Password Boss
Groups can also be synced to Password Boss. Details are in the Synchronizing Groups article.
Using Sync Rules to Customize Sync
Sync rules are used to determine the actions taken in Password Boss when changes are made in Active Directory. Details of the sync rule are in the Sync Rules article.
Creating a group in Entra ID to sync to Password Boss
The Azure Active Directory connector monitors a group in the Active Directory. When users are added to the group, their accounts are created in Password Boss. When users are removed from the groups, disabled, or deleted, their accounts in Password Boss are disabled by default, although you can change this setting in the Sync Rules tab of the connector in the Password Boss Portal.
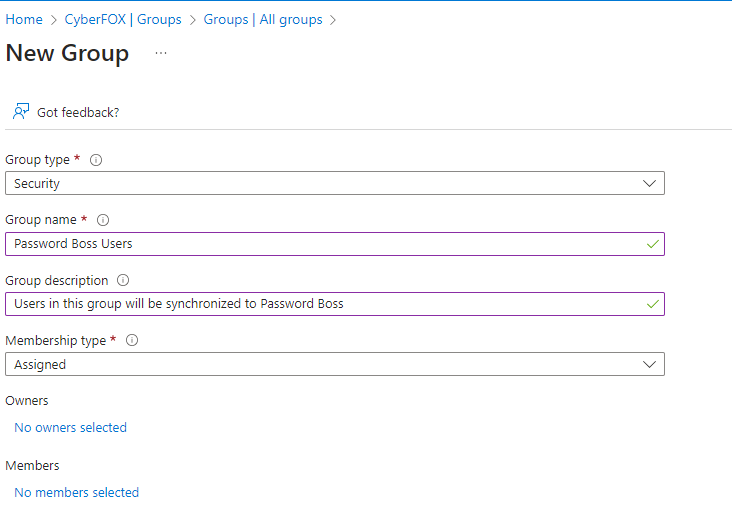
- Create a new security group in Entra ID named Password Boss Users.
Create a new application registration in Azure.
- Go to https://portal.azure.com
- You should be on the Welcome to Azure! Page. Click on the Microsoft Entra ID icon.
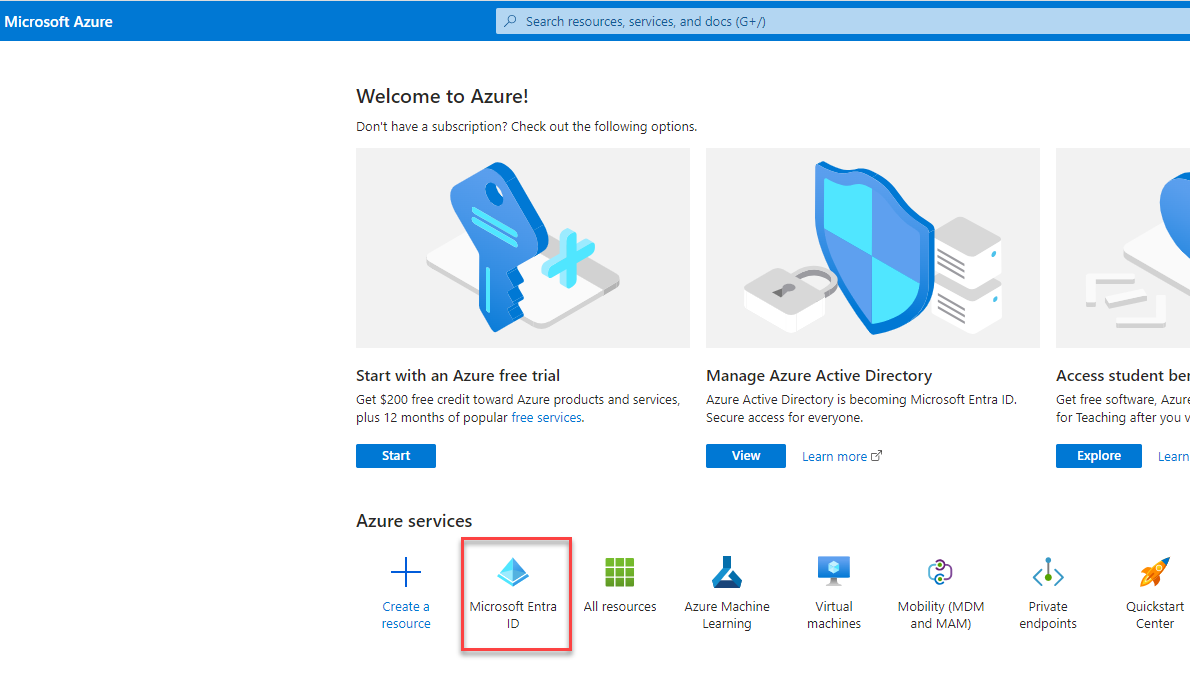
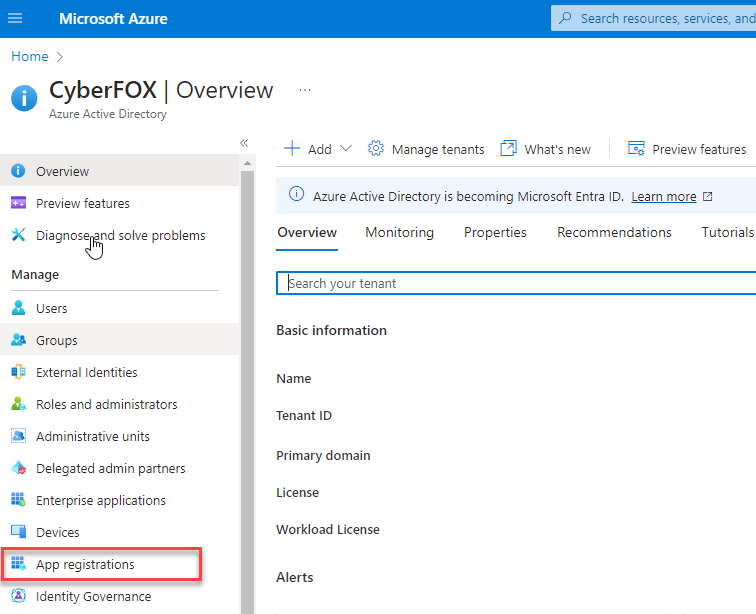
- On the overview page, click App registrations, then Click on New Registration
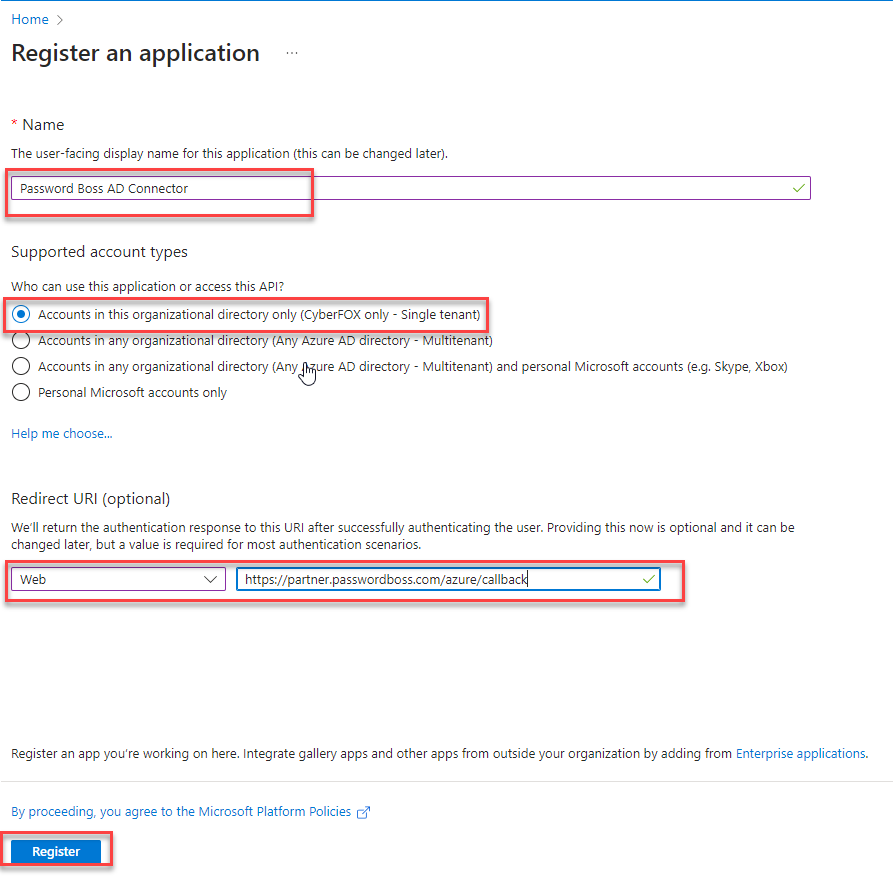
- Name your application Password Boss Connector. In the Supported Accounts Type section, select Accounts in this organizational directory. On the Redirect URI, select Web and use https://partner.passwordboss.com/azure/callback for the URL.
Configure API permissions
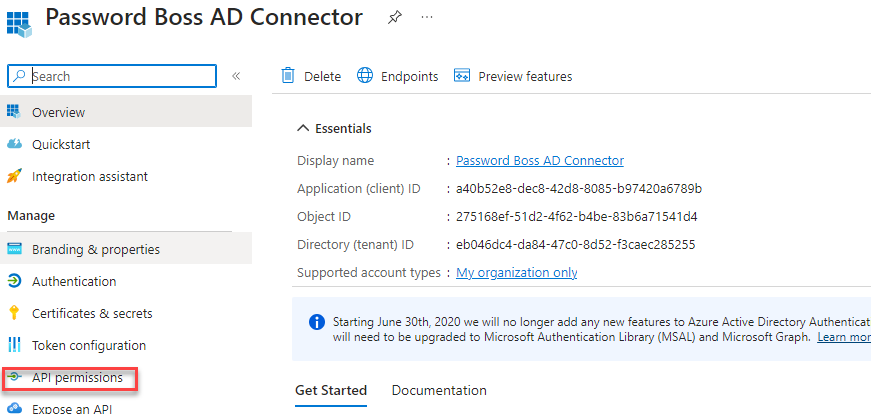
- After saving the new AD connector, you should be on the Overview page for the new connector. Note: Microsoft frequently changes these pages and flows, so you may need to navigate manually to the Overview page, as shown in the screenshot below.
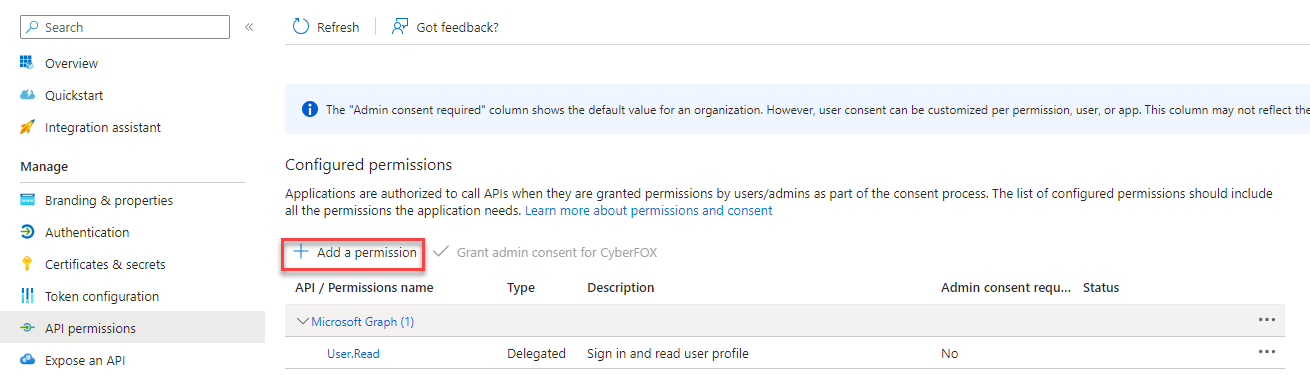
- Click API Permissions
- Click Add a permission
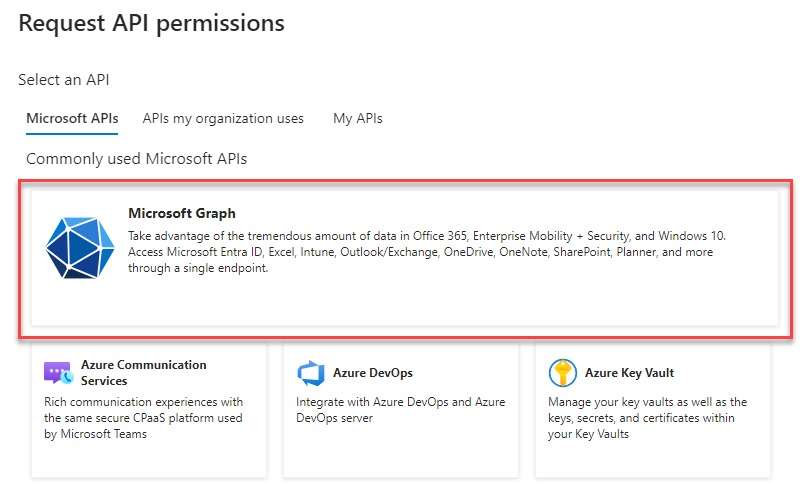
- Select Microsoft Graph
- Select Application permission
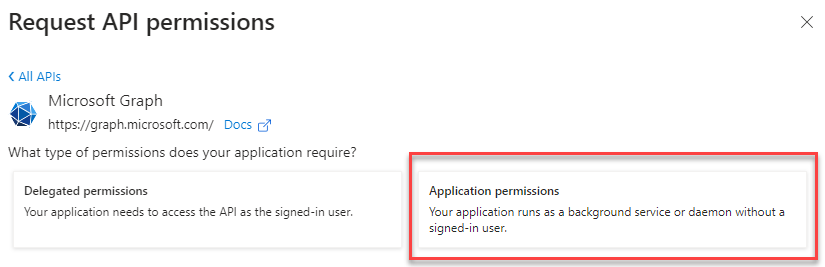
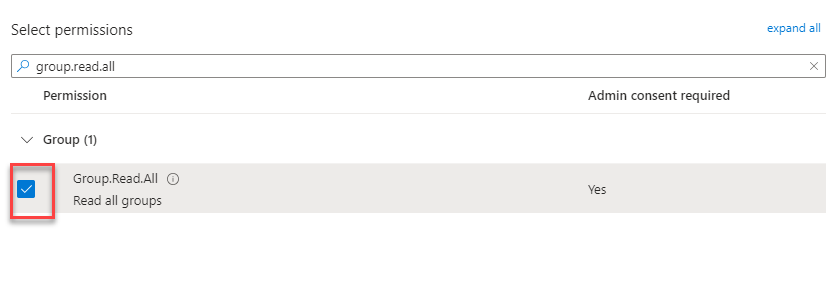
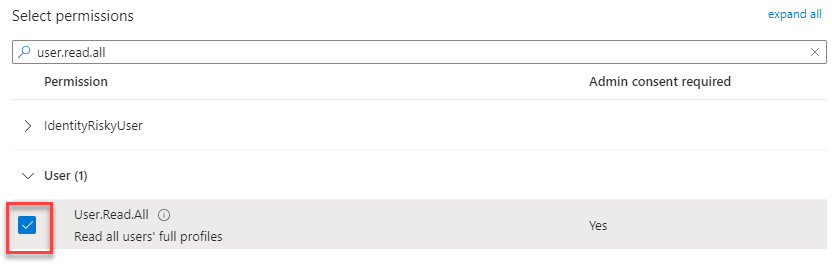
- You will need to set the following two permissions:
-
Group -> Group.Read.All
-
User -> User.Read.All
- Click Add permission at the bottom.
-
Group -> Group.Read.All
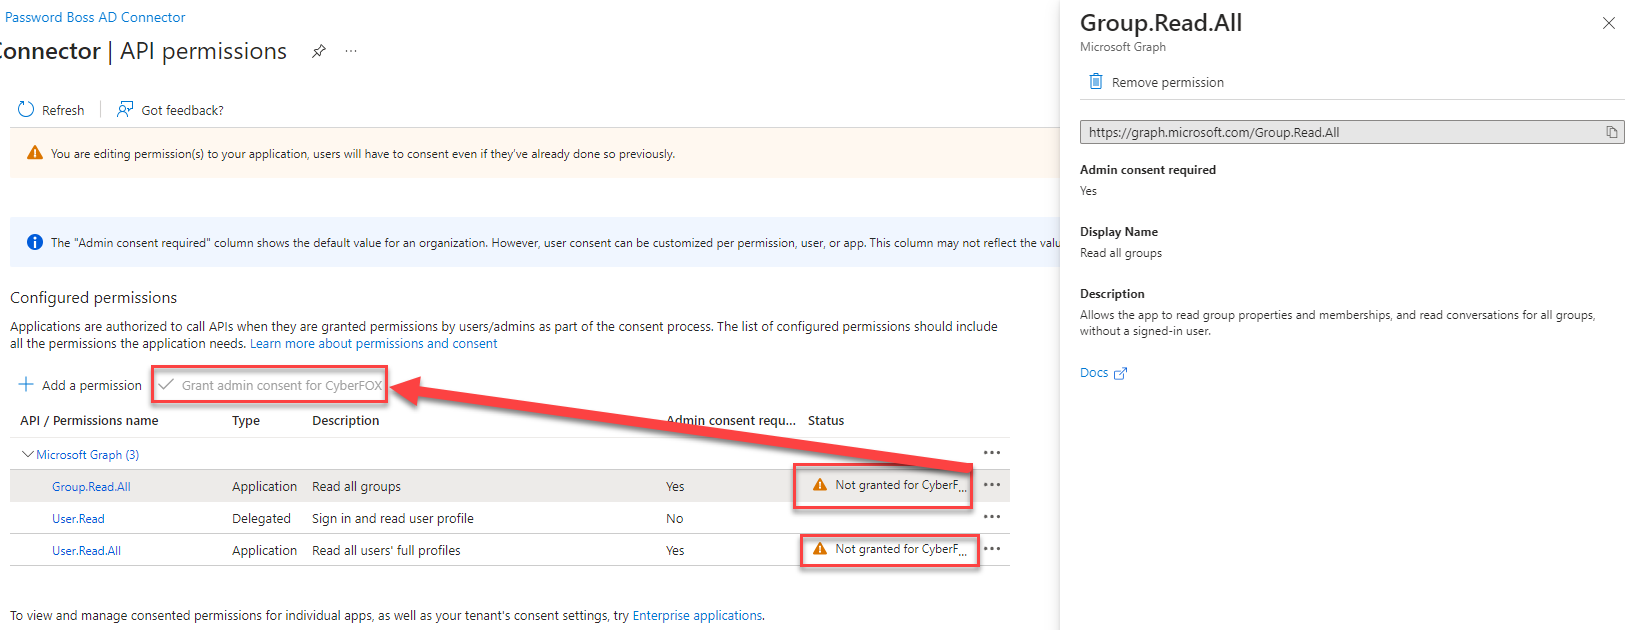
- Click Grant admin consent for [Org Name], then YES
Create a client secret key.
- Select the application you created (Password Boss Connector), then click on Certificates & secrets (1) in the Manage section.
- Click on New client secret (2) to create a new one.
- For the description of the client secret, name it Password Boss Connector (3), and then set the Expiration date (4) to be appropriate for your organization. Then click Add (5).

- Copy your secret Value (1) now and save this in a safe place. Once you leave this page, it will not be shown again. We recommend placing the secret Value as a digital Note in Password Boss and sharing it with the appropriate team members. You will need the key to finish the configuration on the Password Boss Portal.

Copy the Application ID and Tenant ID values
Now switch to the Overview tab of the Password Boss Connector App and copy the Application (client) ID and the Directory (tenant) ID. Save these values in a safe place (Password Boss secure note) to finish the setup on the Password Boss Portal.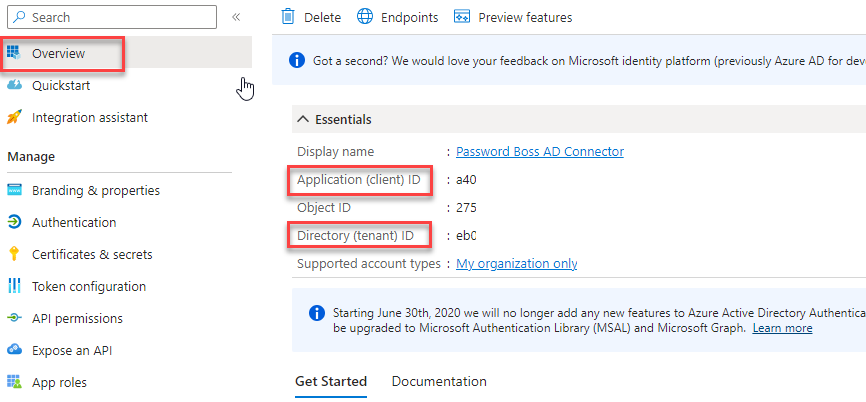
Specify redirect URIs
- On the same Overview screen, click on the Redirect URIs link to add a Redirect URI
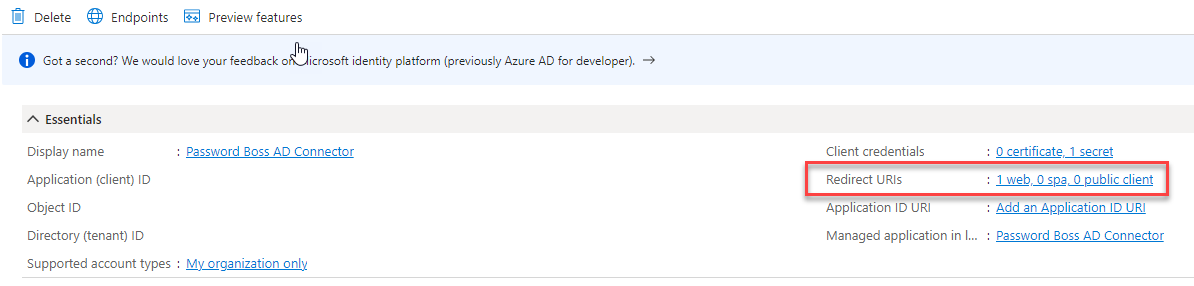
- On the Authentication screen, click on Add URI and add https://portal.passwordboss.com/business/connectors/azure/callback, and then click Save. You should now have two redirect URIs.

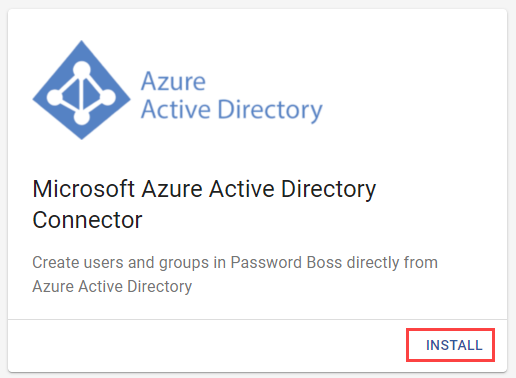
Install the Azure Active Directory Connector
- Open the Password Boss Portal.
- In the Partner Portal, the connector is located on the Connectors tab for each Company.
- In the User Portal, the connector is located on the Integrations tab.
- Click Install
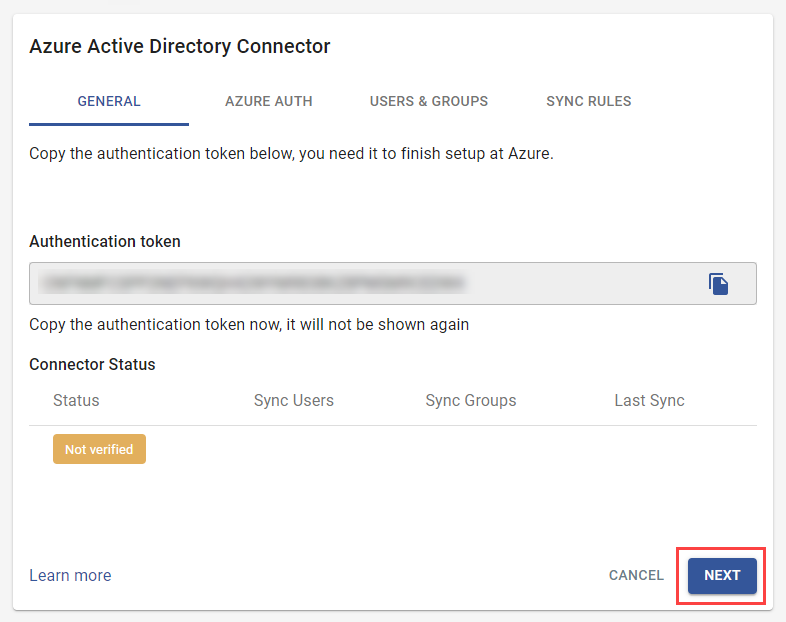
- Copy and save the Authentication token in a safe place for future use, and click Next.
- Enter the Client ID, Client Secret, and Tenant ID from previous steps when you set up the Entra ID application, and click Verify Connection
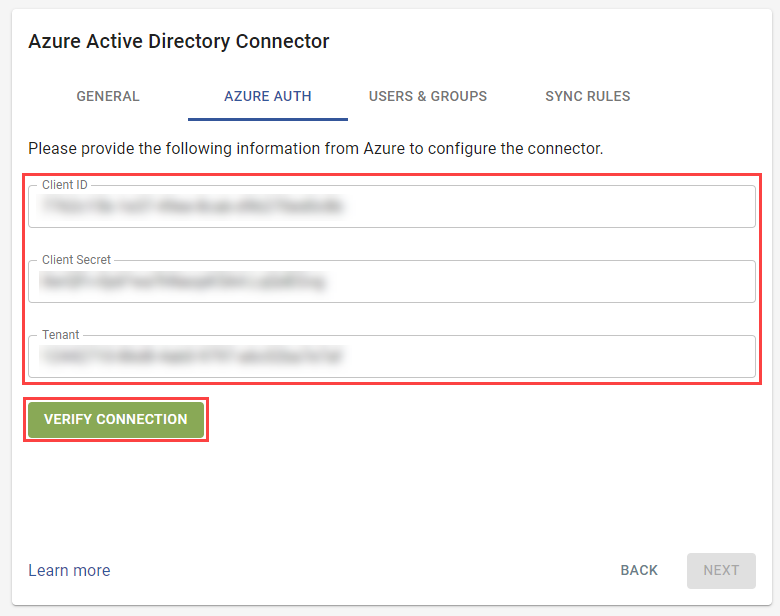
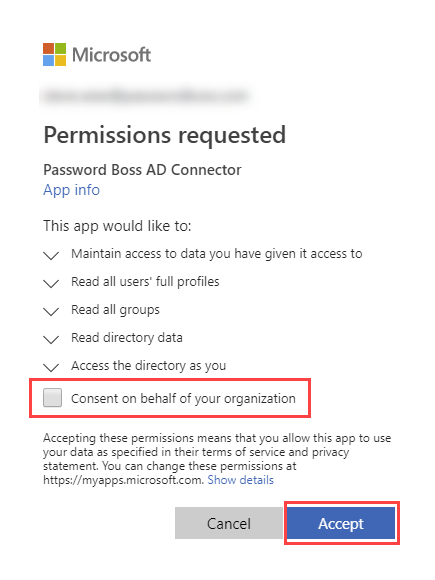
- Your browser will redirect you to Microsoft to authorize the connection. Use an appropriate login with the correct permissions, then click to provide consent on behalf of your organization and click Accept.
- After successful verification at Microsoft, you will see Connection Verified.
- Click Next to continue.
- On the Users & Groups tab, click the green button to select the Password Boss Users group you created in the first section of this guide. The group selected here will be synchronized to Password Boss.
Notes: As a best practice, use a dedicated group only to manage users in Password Boss. Only one group can be selected for synchronization to Password Boss.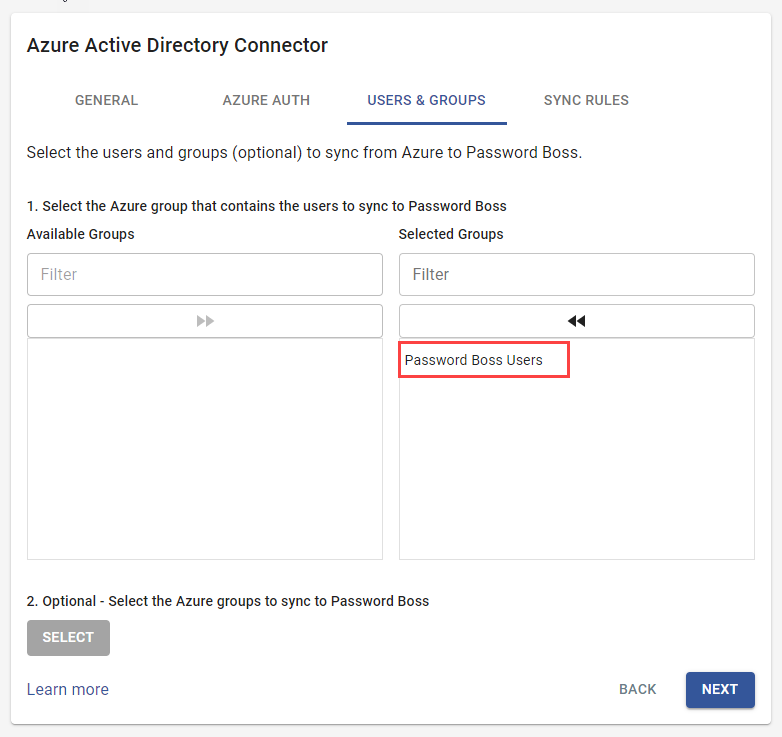
-
Optional— Press Select to add more Azure groups to sync with Password Boss, which you can use as organizational groups within Password Boss. Any selected groups will be synchronized with Password Boss as long as they include users from the specified sync group above. Empty groups will not be synchronized.
- Click Next
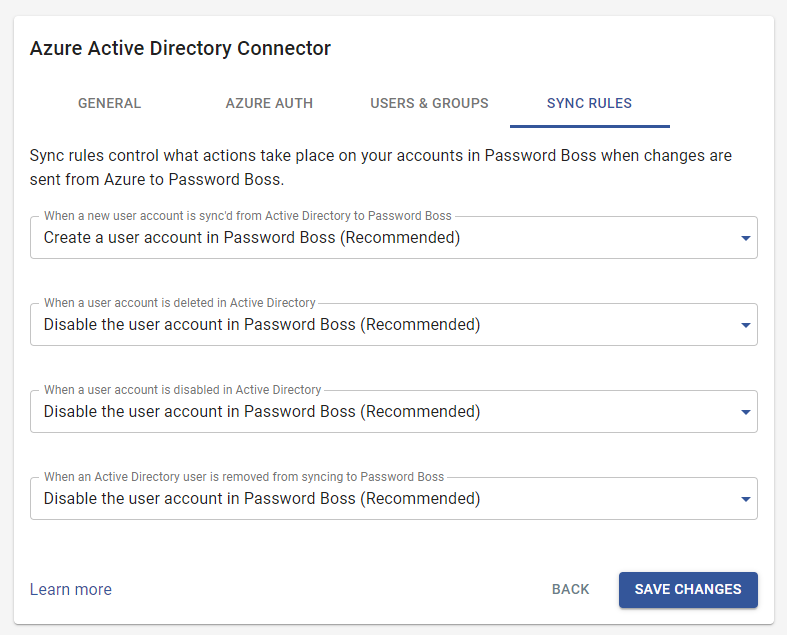
-
Review the sync rules. In most cases, the default setting is the best choice. Do not use the option to convert to a personal account if the users have corporate email addresses, because once they lose access to the corporate email box, they will no longer be able to use Password Boss. Use that option only for organizations that use personal email addresses for Password Boss accounts. Once you are happy with the rules selected, click Save Changes.
- When you return to the connector list in the portal, you will see the connector with a status of Waiting for connect

- This status will transition to Connected within a few minutes after the first sync.

- Users whose accounts were synchronized from Entra ID will show Azure AD in the Managed By column of the Users tab of the portal.
Troubleshooting synchronization
Synchronization runs every five minutes with Entra ID. If you have made changes in Azure AD that are not being updated in Password Boss, follow these troubleshooting steps.
- Check what status is shown for the Azure AD connector in the Password Boss Portal?
- Connected means the last connection to Microsoft was successful
-
Unauthorized means you need to reauthorize the Azure AD connector. Edit the connector from the Azure Auth tab and click Verify Connection.
- Check your Password Boss Users group in Entra ID to confirm the correct users are in the group. Empty groups will not synchronize with Password Boss.
- If synchronization seems stuck, you can perform a manual synchronization. On the Connectors tab, select the checkbox next to the connector, and from the Actions menu, select Synchronize Now. Then wait a few minutes to see if the status updates or missing users are added.