How to make an Identity
Discover the key steps to creating an identity in Password Boss

Written by Owen Parry
Updated at April 17th, 2026
Table of Contents
An Identity in Password Boss is a grouping of items like addresses, phone numbers, and credit cards that can be used together to make website form filling and online checkout fast and easy.
Before creating an identity, make sure you create the identity items that will make up the identity, like Your name, Phone NUmber, email addresses, etc. Create those by visiting the Personal Info section of the App.
Saving an Identity
WebApp
-
Open Password Boss by navigating to https://app.passwordboss.com
2. Select the Identities menu item on the left
3. Click on Add New Identity.
4. In the Identity Name field, enter a descriptive name like “Alex @ Work.”
5. To set an identity as your default, click the Make Default (star) icon in the window's upper-right corner. The default identity will automatically be used whenever a website requires a form to be auto-filled with personal data.
6. Select the items you wish to add to the identity in each category.
7. Click Save when you have finished.
iOS
- Open Password Boss.
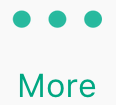
- From the bottom menu, tap More
- Tap Identities.
- Tap the green and white circle
 to add a new Identity.
 - The Add Identity screen will open.
- In the Name field enter a descriptive name - for example, Alex @ Work.
- You can change the image used by clicking the Change Image button.
- Marking an Identity as the Default Identity means that this Identity will show at the top of the list when you are on websites.
- In each of the categories, select the items that you want to add to the Identity.
- Tap Save when you are done.
Android
- Open Password Boss.
- From the top left, tap the menu icon

- Tap Identities from the left menu.
- Tap the orange circle
 to add a new Identity.
 - The Add Identity screen will open.
- In the Name field, enter a descriptive name - for example, Alex @ Work.
- You can change the image used by clicking the change Image button.
- Marking an Identity as the Default Identity means that this Identity will show at the top of the list when you are on websites.
- In each of the categories select the items that you want to add to the Identity.
- Tap Save when you are done.,
Note: You can create as many Identities as you need. For example, it is common to create different Identities for Home and Work.
Adding your photo to your Identity
If you want to add your photo to your identity, you need to create a free account at Gravatar.com. When you create your account, be sure that your email address is the same one used in your Identity.
Once you have added an image to gravatar.com, the image will be added to your Identity automatically.
Tip: The Identity marked as Default Identity will show up first when you are on websites.